
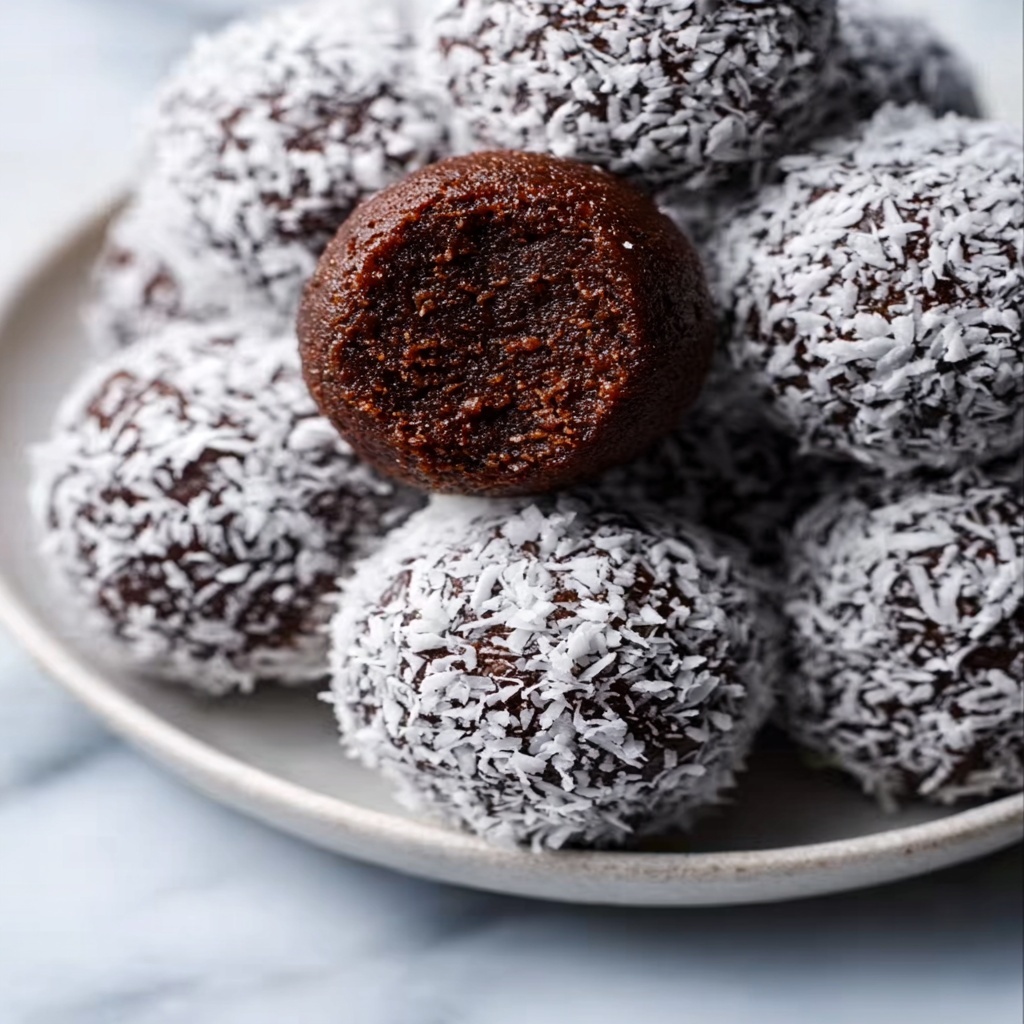
If you crave a little something sweet but want to keep things nourishing and guilt-free, this Wholesome Chocolate Bliss Balls Recipe is absolutely the answer. These no-bake treats pack rich cocoa flavor with the natural sweetness of dates, a satisfying crunch from nuts, and a wholesome boost from chia seeds or flaxseed meal. They’re delightfully chewy, wonderfully chocolatey, and perfect for a quick pick-me-up any time of day. I promise, once you make these bliss balls, you’ll be reaching for them again and again!
Ingredients You’ll Need
Gathering simple, everyday ingredients is all it takes to whip up these delightful chocolate bites. Each component plays a crucial role, whether it’s providing depth of flavor, texture, or that perfect natural sweetness. Here’s what you’ll need for your kitchen arsenal:
- Medjool dates, 1 cup (pitted): The naturally sweet binder that adds caramel-like flavor and chewiness.
- Raw almonds or walnuts, ½ cup: Adds a satisfying crunch and healthy fats.
- Unsweetened cocoa powder, ¼ cup: Brings that rich chocolate essence without extra sugar.
- Chia seeds or flaxseed meal, 2 tablespoons: Boosts fiber and omega-3s while helping to thicken the mix.
- Nut butter, 1 tablespoon (almond, peanut, or cashew): Enhances creaminess and adds richness.
- Maple syrup or honey, 1 tablespoon (optional): For that extra touch of natural sweetness, if desired.
- Vanilla extract, 1 teaspoon: Smells heavenly and rounds out the flavor beautifully.
- Pinch of sea salt: Balances the sweetness and intensifies the chocolate notes.
- Optional coatings – shredded coconut, cocoa powder, or crushed nuts: For a fun, textured finish that adds extra flair.
How to Make Wholesome Chocolate Bliss Balls Recipe
Step 1: Blend the Ingredients
Start by tossing your pitted Medjool dates, nuts, cocoa powder, chia seeds, nut butter, maple syrup if using, vanilla extract, and sea salt into a food processor. Pulse everything in short bursts until the mixture becomes sticky and holds together well. Small bits of nuts should remain for a pleasant texture – it’s all about that perfect chew!
Step 2: Form into Balls
Once your mixture is ready, scoop out tablespoon-sized portions and roll them gently between your palms to form bite-sized balls. If the dough feels dry and crumbly, add a teaspoon or two of water to help it stick together. Conversely, if the mixture is too wet, sprinkle in a bit more nuts or even some oats to balance it out.
Step 3: Add Optional Coatings
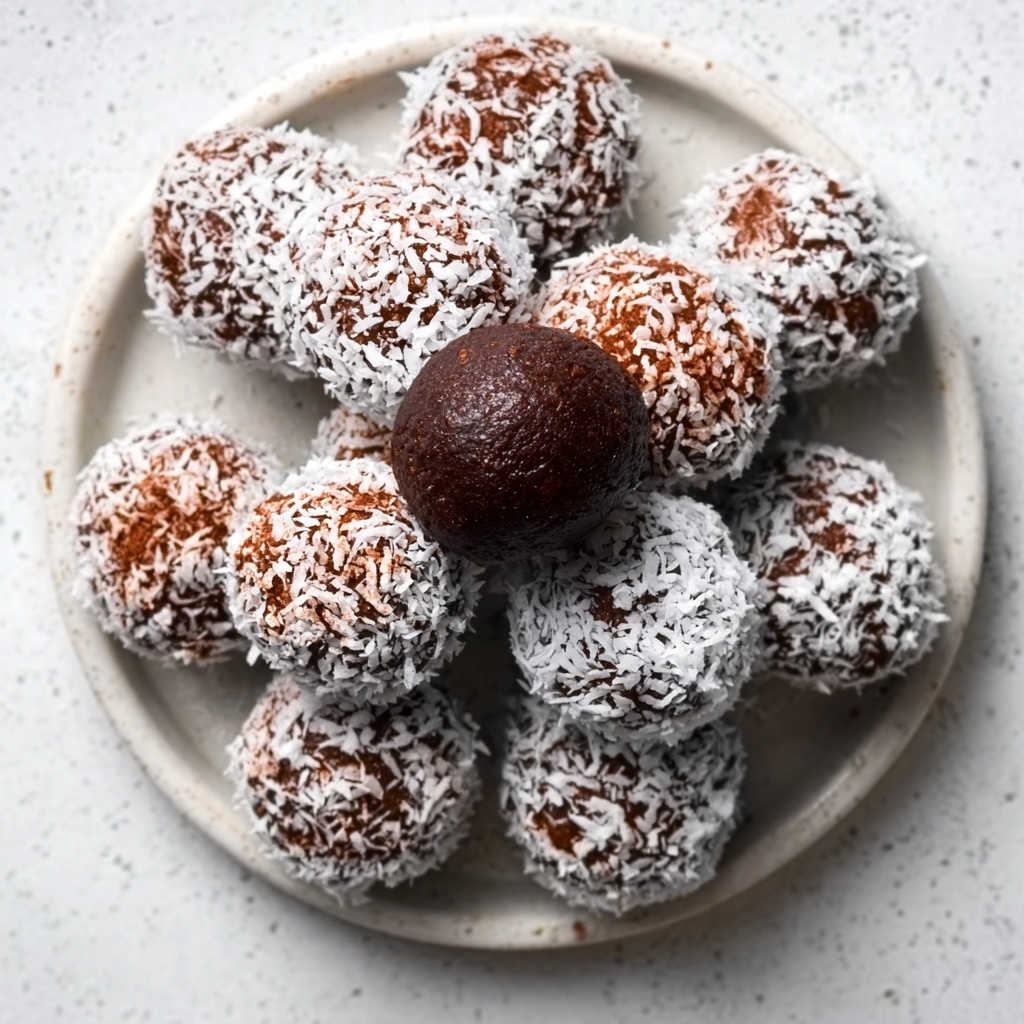
This is where you can get creative! Roll your bliss balls in shredded coconut, extra cocoa powder, or crushed nuts for an extra layer of tasty texture and visual appeal. These coatings not only enhance the flavor but make your treats look irresistible.
Step 4: Chill and Set
Place the bliss balls on a tray lined with parchment paper and pop them into the fridge for at least 30 minutes. This chilling step firms them up, making them easier to handle and elevating the overall texture. After chilling, your Wholesome Chocolate Bliss Balls Recipe is ready to be enjoyed or stored for later!
How to Serve Wholesome Chocolate Bliss Balls Recipe
Garnishes
For an inviting presentation, consider sprinkling extra shredded coconut, a dusting of cocoa powder, or cracking a few fresh nuts on top just before serving. A tiny drizzle of melted dark chocolate can also add a touch of elegance and boost the chocolate factor.
Side Dishes
These bliss balls make wonderful companions to a warm cup of herbal tea or your favorite nut milk latte. Paired with fresh fruit or a colorful salad, they can round out a wholesome snack or a light dessert beautifully.
Creative Ways to Present
Place the bliss balls in pretty mini cupcake liners, arrange them on a rustic wooden board alongside nuts and dried fruit, or stack them in a glass jar for an on-the-go treat. They’re perfect for gift-giving, lunchboxes, or simply holding on your countertop for quick access!
Make Ahead and Storage
Storing Leftovers
Store any leftover bliss balls in an airtight container in the refrigerator. They’ll stay fresh and delicious for up to one week, maintaining their chewy texture and rich flavor.
Freezing
If you want to keep these treats handy for longer, freezing works like a charm. Lay the balls out on a parchment-lined tray and freeze until solid, then transfer them to a freezer-safe container or bag. They’ll keep for up to three months and thaw quickly at room temperature.
Reheating
Because these are no-bake and meant to be enjoyed chilled, reheating isn’t necessary. However, if you prefer a softer texture, just bring them to room temperature or warm briefly in your hands before eating.
FAQs
Can I use other nuts instead of almonds or walnuts?
Absolutely! Cashews, pecans, or even hazelnuts would work wonderfully in this Wholesome Chocolate Bliss Balls Recipe, each adding its own unique flavor and texture.
Are these bliss balls suitable for a vegan diet?
Yes, they are naturally vegan, especially if you choose maple syrup instead of honey. All ingredients are plant-based and free of dairy or animal products.
What if I don’t have a food processor?
While a food processor makes blending much easier, you can finely chop the nuts and dates by hand and mix everything thoroughly with a spoon or your hands until it sticks together.
Can I make these nut-free?
To keep them nut-free, swap out nuts and nut butter for seeds like pumpkin or sunflower seeds and seed butter. The texture may change slightly but the flavor will stay delicious.
How long do the Wholesome Chocolate Bliss Balls last?
Stored properly in the fridge, they last about one week. Freezing can extend their shelf life to three months without losing quality.
Final Thoughts
This Wholesome Chocolate Bliss Balls Recipe is more than just a treat – it’s a little bite of joy you can feel good about. Their simplicity and deliciousness make them a true staple in my kitchen, and I hope once you try them, they’ll become a favorite in your home too. So next time a chocolate craving strikes, reach for these wholesome bliss balls and indulge in pure, nourishing delight!
Print
Wholesome Chocolate Bliss Balls Recipe
- Prep Time: 10 minutes
- Cook Time: 0 minutes
- Total Time: 40 minutes
- Yield: 12–14 balls
- Category: Snack, Dessert
- Method: No-Cook
- Cuisine: Healthy, Plant-Based
- Diet: Vegan, Gluten Free, Dairy-Free
Description
Wholesome Chocolate Bliss Balls are nutritious, no-bake energy bites made from Medjool dates, nuts, cocoa powder, and seeds. These easy-to-make treats provide a perfect balance of natural sweetness, healthy fats, and protein, making them an ideal snack or dessert for anyone seeking a delicious plant-based and gluten-free option.
Ingredients
Main Ingredients
- 1 cup Medjool dates (pitted)
- ½ cup raw almonds or walnuts
- ¼ cup unsweetened cocoa powder
- 2 tablespoons chia seeds or flaxseed meal
- 1 tablespoon nut butter (almond, peanut, or cashew)
- 1 tablespoon maple syrup or honey (optional, for extra sweetness)
- 1 teaspoon vanilla extract
- pinch of sea salt
Optional Coatings
- shredded coconut
- cocoa powder
- crushed nuts
Instructions
- Prepare the mixture: Add the dates, almonds, cocoa powder, chia seeds, nut butter, maple syrup (if using), vanilla extract, and pinch of sea salt to a food processor. Pulse until the mixture is well combined and sticky, ensuring there are small bits of nuts remaining to provide texture.
- Shape the bliss balls: Scoop out tablespoon-sized portions of the mixture and roll them into balls using your hands. For added flavor and texture, roll each ball in your choice of shredded coconut, cocoa powder, or crushed nuts to coat evenly.
- Chill and store: Place the coated bliss balls on a parchment-lined tray and refrigerate for at least 30 minutes to firm up. Once set, store the bliss balls in an airtight container in the refrigerator for up to 1 week or freeze them for up to 3 months for longer storage.
Notes
- If the mixture is too dry, gradually add 1–2 teaspoons of water to help it come together.
- If the mixture is too wet, incorporate a few extra nuts or oats to achieve the desired consistency.
- These bliss balls make a great pre-workout snack or a naturally sweet treat with no refined sugar.


