
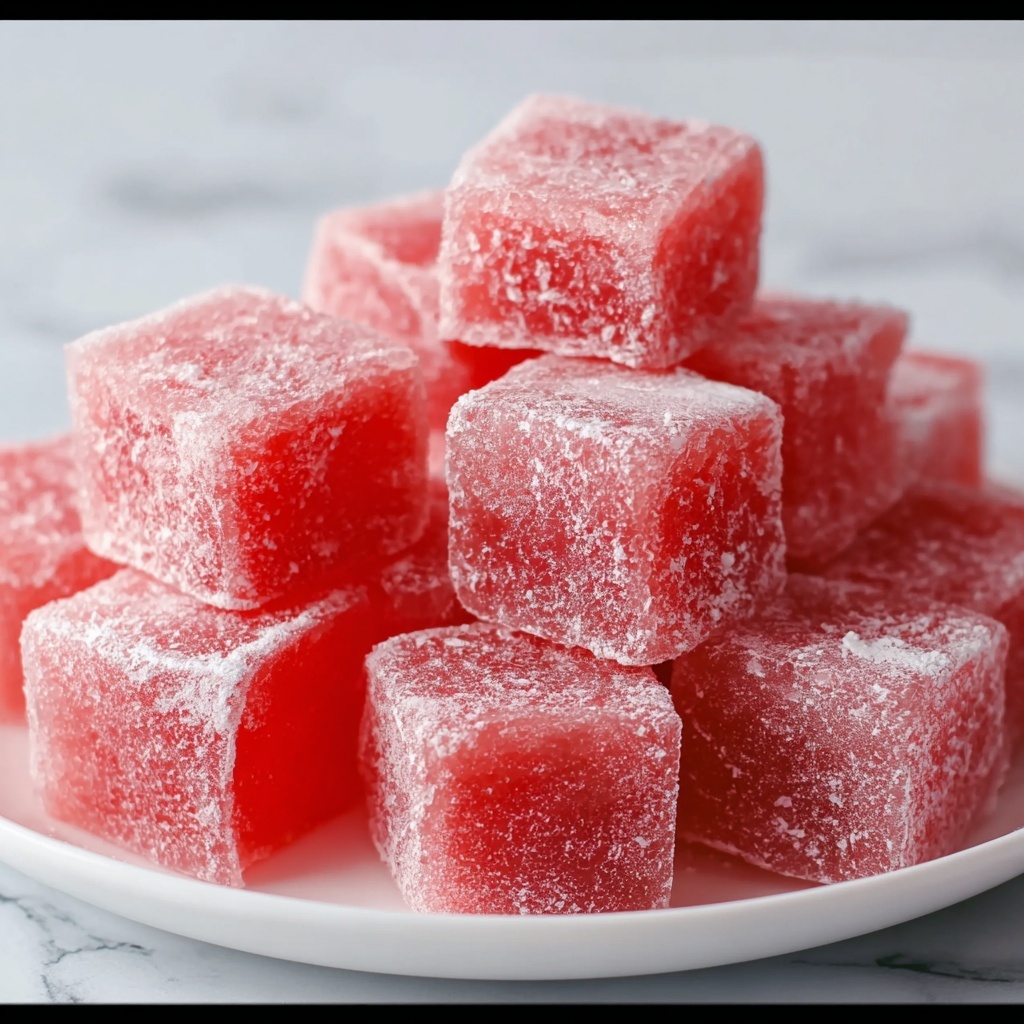
If you have a soft spot for tender, chewy sweets with a refreshing fruity twist, then this Watermelon Mochi Recipe is about to become your new favorite treat. It blends the delicate chewiness of traditional mochi with the bright, summery flavor of fresh watermelon juice, creating bite-sized delights that are as fun to make as they are to eat. Perfect for a light dessert or a unique snack, these watermelon mochi pieces bring a splash of color and sweetness to any occasion, with a hint of optional citrus brightness and playful “seeds” to mimic watermelon inside. It’s an irresistible combination that highlights simplicity without compromising on flavor or texture.

Ingredients You’ll Need
Getting started with this Watermelon Mochi Recipe is a breeze because it calls for just a handful of simple, fresh ingredients — each one playing an important role in creating its signature taste and chewy texture.
- Glutinous rice flour (mochiko): This is the backbone of all good mochi, lending that characteristic sticky chewiness you crave.
- Watermelon juice (strained): Freshly squeezed and strained to capture the essence of summer sweetness and vibrant color.
- Sugar: Balances the natural tartness and enhances the overall flavor.
- Lemon juice (optional): Adds a little bright acidity that lifts the watermelon’s natural flavor.
- Cornstarch or potato starch (for dusting): Keeps your hands and work surface non-sticky so you can shape each mochi perfect.
- Red or pink food coloring (optional): For a deeper, more visually striking watermelon hue.
- Mini chocolate chips or black sesame seeds (optional): A fun little touch to recreate the look of watermelon seeds inside your mochi.
How to Make Watermelon Mochi Recipe
Step 1: Mix Your Ingredients
The first step is simple, but important for that smooth texture — whisk together glutinous rice flour, sugar, and freshly strained watermelon juice in a microwave-safe bowl. If you like, add a small splash of lemon juice for brightness and a drop or two of food coloring to bring out that beautiful watermelon pink color. Mix until the batter is perfectly smooth with no lumps.
Step 2: Cook the Mochi Dough
Next, loosely cover the bowl with plastic wrap or a microwave-safe plate and pop it into the microwave. Start with one minute on high, then stir the mixture with a wet spatula. Continue microwaving in 30-second increments, stirring between each one, until the mochi dough thickens, becomes sticky, and looks slightly translucent. This usually takes about 2 to 3 additional rounds. Don’t rush this step — proper cooking ensures the mochi has that soft, stretchy texture we all adore.
Step 3: Prepare for Shaping
Dust a clean surface generously with cornstarch or potato starch — this prevents sticking and makes shaping a joy, never a mess. Transfer your warm mochi dough to this surface and let it cool just enough to handle comfortably without losing that wonderful pliability.
Step 4: Shape the Mochi
With hands dusted lightly in starch, divide the dough into small portions about a tablespoon each. Flatten each piece slightly, and if you want to mimic watermelon seeds, press a few mini chocolate chips or black sesame seeds right in the center. Then, gently roll each piece into a ball or shape them into soft discs. This hands-on step is so satisfying as you see each individual mochi taking shape before your eyes.
Step 5: Let Cool and Serve
Allow your watermelon mochi to cool completely, either at room temperature or chilled, depending on your preference. Once cooled, they’re ready to be enjoyed — the perfect combination of fruity freshness and chewy delight!
How to Serve Watermelon Mochi Recipe
Garnishes
To elevate your Watermelon Mochi Recipe, consider garnishing each piece with a light dusting of powdered sugar or a sprinkle of matcha powder for a contrasting earthiness. Fresh mint leaves on the side enhance the refreshing vibe and add a pop of green that looks gorgeous against the pink mochi.
Side Dishes
This recipe pairs wonderfully with other light and fresh treats, like a bowl of mixed berries or a cup of jasmine tea. The gentle earthiness of the tea complements the sweet watermelon flavor, making for a harmonious snack or dessert experience.
Creative Ways to Present
Presentation can take your Watermelon Mochi Recipe from simple to stunning. Try serving the mochi on a platter lined with shiso leaves or edible flowers for a Japanese-inspired aesthetic. You can also place them in small colorful paper cups to bring out their charming size, perfect for parties or gift-giving.
Make Ahead and Storage
Storing Leftovers
If you happen to have leftovers (though it’s hard to resist these), store your watermelon mochi in an airtight container at room temperature for up to two days. They’ll remain soft and chewy but avoid excess moisture, which can make them sticky or tough.
Freezing
You can freeze these mochi treats if you want to enjoy them later. Place them in a single layer on a parchment-lined tray, freeze until solid, then transfer to a freezer-safe container or bag. When ready to eat, let them thaw at room temperature — they retain their texture quite nicely.
Reheating
To revive their softness, especially if refrigerated or frozen, briefly microwave watermelon mochi on low power for about 10 seconds. This warms them through without melting their shape, giving back that freshly made chewiness you love.
FAQs
Can I use watermelon chunks instead of juice?
Fresh watermelon chunks won’t work as well because the recipe needs smooth juice for the mochi dough. Straining juice ensures the right moisture and texture for chewy mochi. However, you can always enjoy packed chunks alongside your mochi for extra fruity fun.
Is watermelon mochi gluten-free?
Yes! This Watermelon Mochi Recipe uses glutinous rice flour, which is gluten-free despite its name. It’s a fantastic option for anyone avoiding gluten but wanting a chewy, satisfying dessert.
Why add lemon juice?
Lemon juice is optional but a brilliant addition because it enhances the watermelon’s natural brightness and adds a subtle tang that rounds out the sweetness beautifully.
Can I make these without a microwave?
Microwaving is the quickest method, but you can also steam the mochi dough on the stovetop. Just be sure to stir frequently as it cooks to reach that perfect sticky texture.
How long does watermelon mochi last?
These delightful bites are best enjoyed fresh or within a couple of days when stored at room temperature. Refrigeration can extend their life but might make them chewier.
Final Thoughts
This Watermelon Mochi Recipe is one of those magic combinations that feels like a cool summer breeze and a cozy treat all rolled into one. It’s incredibly easy to make, customizable, and brings a joyful splash of color and flavor to your dessert repertoire. Give it a go and share the love — I promise these sweet, chewy watermelon gems will bring smiles to everyone lucky enough to try them!
Print
Watermelon Mochi Recipe
- Prep Time: 10 minutes
- Cook Time: 3-4 minutes
- Total Time: 15 minutes
- Yield: 10-12 pieces
- Category: Dessert, Snack
- Method: Microwave
- Cuisine: Japanese-Inspired
- Diet: Gluten Free, Vegan
Description
Watermelon Mochi is a delightful, refreshing Japanese-inspired dessert perfect for summer. Made with glutinous rice flour and fresh watermelon juice, this sweet treat is chewy, fruity, and subtly sweetened, with an optional hint of lemon for brightness. Easy to prepare using a microwave, these bite-sized mochi pieces can be customized with chocolate chips or black sesame seeds to mimic watermelon seeds, making them as fun to look at as they are to eat.
Ingredients
Main Ingredients
- 1 cup glutinous rice flour (mochiko)
- ¾ cup watermelon juice (strained)
- ¼ cup sugar
- ½ teaspoon lemon juice (optional, for brightness)
For Dusting and Decoration
- Cornstarch or potato starch (for dusting)
- Red or pink food coloring (optional)
- Mini chocolate chips or black sesame seeds (optional, for “seeds”)
Instructions
- Mix Ingredients: In a microwave-safe bowl, whisk together glutinous rice flour, sugar, watermelon juice, and lemon juice (if using) until the mixture is smooth and uniform. Add a drop or two of red or pink food coloring to enhance the watermelon color if desired.
- Microwave Cooking: Loosely cover the bowl with plastic wrap or a microwave-safe plate. Microwave on high for 1 minute, then stir with a wet spatula. Continue microwaving in 30-second intervals, stirring between each session, for 2–3 more times until the mochi dough is thick, sticky, and slightly translucent.
- Prepare Surface: Dust a clean work surface generously with cornstarch or potato starch to prevent sticking. Transfer the hot mochi dough onto the surface and allow it to cool slightly until it is comfortable to handle.
- Shape Mochi: Dust your hands with starch and divide the dough into small portions of about 1 tablespoon each. Flatten each portion and, if desired, place mini chocolate chips or black sesame seeds in the center to resemble watermelon seeds. Roll into balls or gently press into flat discs.
- Cool and Serve: Let the shaped mochi cool completely. Serve at room temperature or chilled for a refreshing treat.
Notes
- Use freshly strained watermelon juice for the best natural sweetness and flavor.
- Store mochi in an airtight container at room temperature for 1–2 days or refrigerate to enjoy a chewier texture.
- Optional lemon juice adds brightness but can be omitted if preferred.
- Dusting with cornstarch or potato starch is crucial to prevent sticking during shaping.
- Add mini chocolate chips or black sesame seeds to mimic watermelon seeds for an authentic look.

