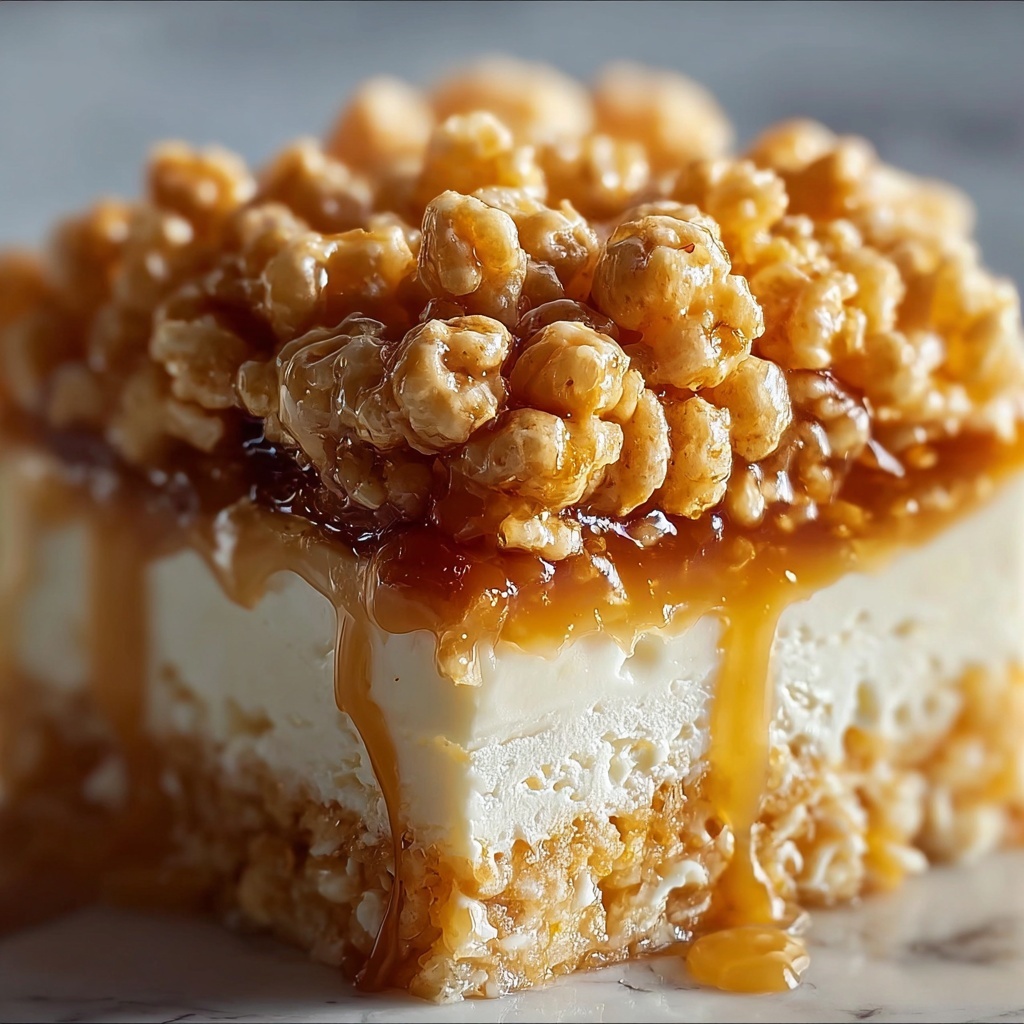
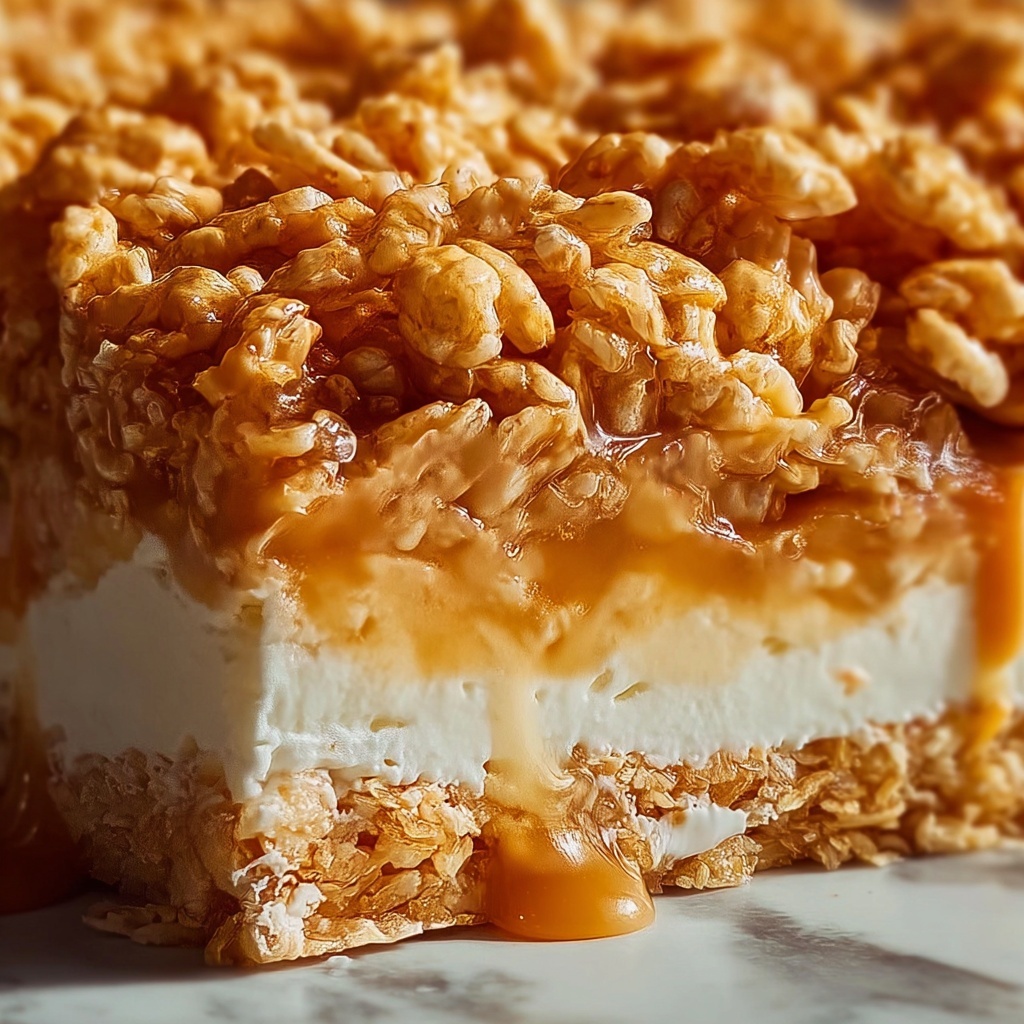
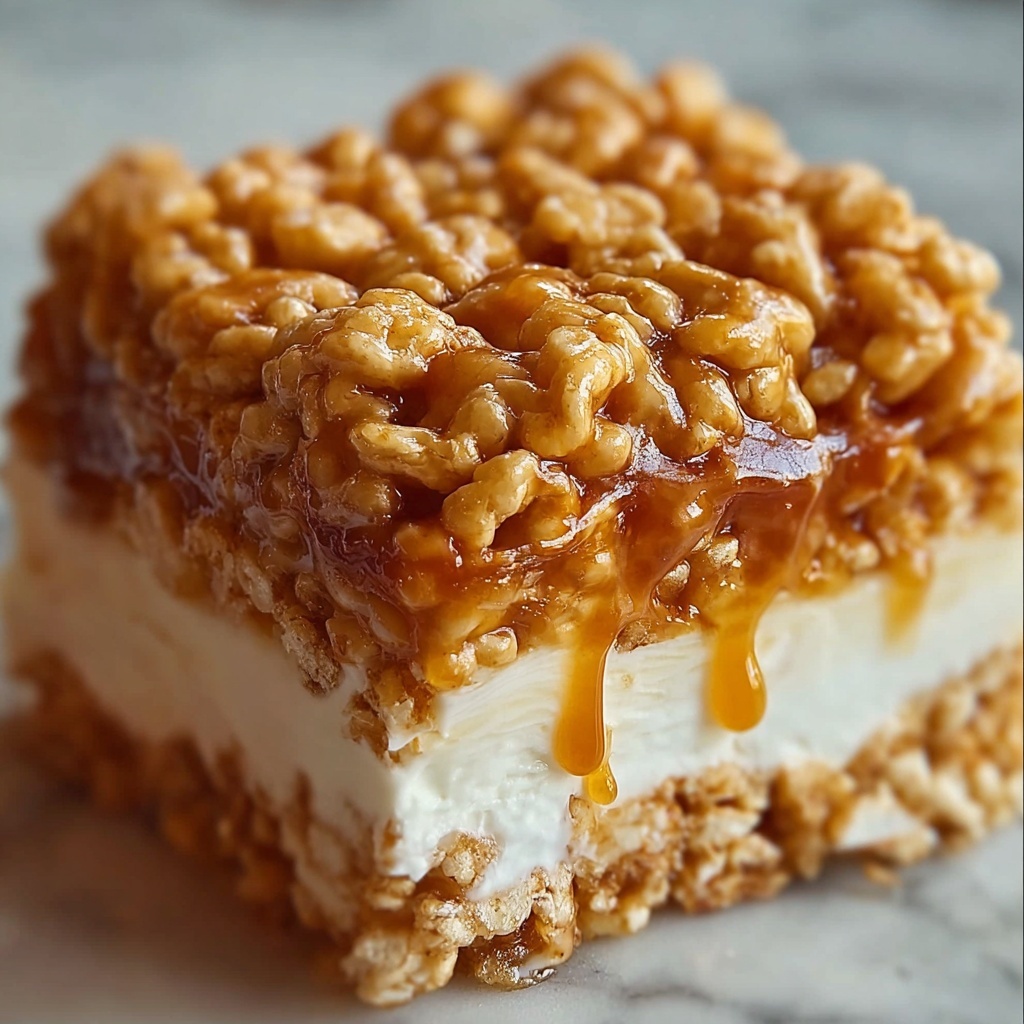
If you are on the hunt for a dessert that is both nostalgic and indulgently creamy, then you are going to love this Rice Krispie Treat Cheesecake Recipe. This fun twist on classic cheesecake features a crunchy, sweet Rice Krispies crust that pairs perfectly with a smooth, fluffy cream cheese filling. It’s no-bake, incredibly easy to put together, and offers a delightful combination of textures and flavors that will have everyone asking for seconds. Whether you’re making it for a casual family gathering or a festive celebration, this recipe is a guaranteed crowd-pleaser.
Ingredients You’ll Need
The beauty of this Rice Krispie Treat Cheesecake Recipe is in its simplicity. Each ingredient plays a vital role—bringing flavor, texture, or that perfect creamy finish to this memorable dessert.
- Unsalted butter: Melts into the base to create a buttery richness that holds the crust together.
- Mini marshmallows: Provide sticky sweetness to bind the Rice Krispies and create that signature chewy crust.
- Rice Krispies cereal: Adds the classic crispy crunch that makes the crust fun and light.
- Cream cheese: The star of the filling; softened to achieve a silky and smooth texture.
- Granulated sugar: Sweetens the cheesecake filling just enough to balance the tanginess of the cream cheese.
- Vanilla extract: Enhances the overall flavor with warm, aromatic notes.
- Heavy cream: Whipped to stiff peaks, it lightens the filling to heavenly fluffiness.
- Optional toppings: Melted chocolate, extra marshmallows, whipped cream, or more Rice Krispies for added flair and texture.
How to Make Rice Krispie Treat Cheesecake Recipe
Step 1: Prepare the Crust
Start by melting the unsalted butter in a large saucepan over low heat. Toss in the mini marshmallows and stir continuously until everything melts into a smooth, glossy mixture. Once your marshmallow blend is ready, remove from heat and stir in the Rice Krispies cereal until every bit is coated with the marshmallow mixture. Press this sticky, sweet blend firmly and evenly into the bottom and just slightly up the sides of a greased 9-inch springform pan. This forms the delightful foundation for your cheesecake. Let it cool completely to set before moving on.
Step 2: Make the Creamy Filling
In a spacious bowl, beat the softened cream cheese with granulated sugar until the texture is perfectly smooth and creamy — no lumps allowed! Add in the vanilla extract and combine thoroughly. Then, whip the heavy cream in a separate bowl until stiff peaks form, showcasing that light and airy texture. The secret to a perfect filling is gently folding this whipped cream into your cream cheese mixture, preserving all that fluffiness. Once mixed, spread the filling over your cooled Rice Krispie crust and smooth out the top with a spatula.
Step 3: Chill and Set
Place your cheesecake in the refrigerator and allow it to chill for at least four hours, or better yet, overnight. This waiting time lets the filling firm up beautifully while the flavors meld into a dreamy combination. When you’re ready, decorate the top with any optional toppings you like, such as a drizzle of melted chocolate, a handful of mini marshmallows, or some extra Rice Krispies for that delightful crunch.
How to Serve Rice Krispie Treat Cheesecake Recipe
Garnishes
To showcase your masterpiece, think about toppings that add a visual and flavor appeal. A drizzle of silky melted chocolate creates an elegant touch while a scatter of mini marshmallows or crushed Rice Krispies adds whimsical texture. Whipped cream dollops bring softness and creaminess that pair perfectly with each bite.
Side Dishes
This Rice Krispie Treat Cheesecake Recipe pairs wonderfully with fresh berries—think raspberries or strawberries—that cut through the sweetness with a tart brightness. A scoop of vanilla ice cream can also enhance the indulgence, turning this dessert into a truly decadent experience.
Creative Ways to Present
Want to elevate your serving game? Try slicing the cheesecake into bars for easy grab-and-go treats or use cookie cutters to create fun shapes for parties. Serving on colorful plates or wooden boards alongside some celebratory sprinkles or edible flowers can make your dessert look as fabulous as it tastes.
Make Ahead and Storage
Storing Leftovers
Once you’ve enjoyed a few slices, wrap the remaining cheesecake tightly with plastic wrap or store it in an airtight container. Keep it refrigerated, where it will stay fresh and delicious for up to 4 days, giving you time to savor every last bite.
Freezing
If you want to make the Rice Krispie Treat Cheesecake Recipe in advance, it freezes beautifully. Wrap the entire cheesecake or individual slices tightly in plastic wrap, followed by aluminum foil to prevent freezer burn. Frozen cheesecake lasts for up to 2 months—just thaw it overnight in the refrigerator when ready to serve.
Reheating
This cheesecake is best served chilled, so reheating isn’t necessary. However, if you’d like a slightly softer texture, allowing it to sit at room temperature for 15 to 20 minutes before serving is perfect.
FAQs
Can I use regular marshmallows instead of mini marshmallows for the crust?
Yes, regular marshmallows can be used, but mini marshmallows melt faster and mix more evenly with the Rice Krispies, making the crust easier to work with.
Is this Rice Krispie Treat Cheesecake Recipe gluten-free?
Rice Krispies cereal contains malt flavoring derived from barley, which has gluten. For a gluten-free version, try using a certified gluten-free crispy rice cereal.
Can I add flavors to the cheesecake filling?
Absolutely! Swirling in peanut butter, chocolate, or even some fruit puree before chilling can add a creative twist to the classic filling.
Do I have to use a springform pan?
A springform pan makes it easier to remove the cheesecake without damaging the sides, but you can also use a regular cake pan or dish if you line it well with parchment paper for easier removal.
How long does the cheesecake need to chill?
For best results, chill for at least four hours to allow the filling to firm up properly. Overnight chilling intensifies the flavor and texture.
Final Thoughts
Making this Rice Krispie Treat Cheesecake Recipe is like giving yourself a giant warm hug of deliciousness that everybody will adore. It’s fun, easy, and perfect for any celebration or just because you deserve something a little special today. Once you try it, I’m sure this recipe will become one of your all-time favorites too!
Print
Rice Krispie Treat Cheesecake Recipe
- Prep Time: 20 minutes
- Cook Time: 0 minutes
- Total Time: 4 hours 20 minutes
- Yield: 10–12 servings
- Category: Dessert
- Method: No-Cook
- Cuisine: American
- Diet: Vegetarian
Description
This Rice Krispie Treat Cheesecake is a delightful no-bake dessert combining a crispy, marshmallow-coated Rice Krispies crust with a luscious, creamy cheesecake filling. Perfect for summer or any occasion, it features a fun and nostalgic twist on traditional cheesecake with an easy preparation and optional toppings like melted chocolate or extra marshmallows for added indulgence.
Ingredients
For the crust:
- 4 tablespoons unsalted butter
- 1 (10 oz) bag mini marshmallows
- 6 cups Rice Krispies cereal
For the filling:
- 16 oz cream cheese, softened
- ½ cup granulated sugar
- 1 teaspoon vanilla extract
- 1 cup heavy cream
Optional topping:
- Melted chocolate drizzle
- Extra marshmallows
- Whipped cream
- Cereal bits
Instructions
- Make the crust: In a large saucepan, melt the butter over low heat. Add the mini marshmallows and stir continuously until they are completely melted and smooth. Remove the saucepan from heat and fold in the Rice Krispies cereal until every piece is evenly coated with the marshmallow mixture.
- Form the crust: Grease a 9-inch springform pan thoroughly. Press the marshmallow-coated cereal mixture firmly and evenly into the bottom of the pan and slightly up the sides to create the crust base. Allow it to cool completely so it firms up.
- Prepare the filling: In a large mixing bowl, beat the softened cream cheese with the granulated sugar until the mixture becomes smooth and creamy. Add the vanilla extract and mix to combine fully. In a separate bowl, whip the heavy cream until stiff peaks form. Gently fold the whipped cream into the cream cheese mixture, ensuring it is well incorporated but keeping the airy texture.
- Assemble and chill: Spoon the cheesecake filling evenly over the cooled Rice Krispie crust in the springform pan and smooth the surface. Refrigerate the cheesecake for at least 4 hours or overnight to allow it to set properly.
- Add toppings and serve: Before serving, optionally decorate the top with melted chocolate drizzle, mini marshmallows, a sprinkle of Rice Krispies, or a dollop of whipped cream for extra texture and flavor.
Notes
- To make slicing the cheesecake easier and cleaner, lightly grease your spatula or knife before cutting.
- For a fun flavor variation, swirl in some peanut butter or melted chocolate into the cheesecake filling before chilling.
- Ensure the crust is fully cooled and firm before adding the filling to prevent mixing and maintain structure.


