
If you’re on the lookout for a dessert that satisfies your sweet tooth without the guilt, this Protein Cottage Cheesecake Jars: Guilt-Free Dessert Bliss Recipe is about to become your new best friend. Creamy, satisfying, and packed with protein, these jars bring together the classic flavors of cheesecake with a health-conscious twist. Each flavorful spoonful balances richness and freshness, all while keeping things light and nourishing. Perfect for a quick treat, a make-ahead snack, or impressing guests with a wholesome dessert, this recipe combines simplicity and indulgence in one delightful jar.
Ingredients You’ll Need
There’s something truly wonderful about keeping ingredients simple yet purposeful. Each one in this list plays an important role in texture, taste, or appearance, making these creamy cheesecake jars a joy to devour.
- Cottage Cheese: Provides the creamy base and a protein punch, but feel free to swap for dairy-free ricotta if you want a vegan option.
- Fat-Free Cream Cheese: Adds richness without the extra calories, and plant-based cream cheese works beautifully for dairy-free needs.
- Vanilla-Flavored Protein Powder: Boosts the protein content and lends a subtle sweetness; chocolate flavor is a fun twist.
- Sugar-Free Maple Syrup: Naturally sweetens the filling without extra sugar load, but regular maple syrup is just as tasty.
- Graham Crackers (or crumbs): Form the crunchy crust layer, with gluten-free crackers if you’re avoiding gluten.
- Melted Butter: Binds the crust crumbs together and adds a comforting buttery flavor; coconut oil is a great non-dairy alternative.
- Fresh Fruits: Bring a burst of color, tang, and natural sweetness—berries or bananas are fabulous choices.
- Blueberry Jam (optional): Adds a fruity flair and visual appeal; opt for sugar-free jam for a healthier touch.
How to Make Protein Cottage Cheesecake Jars: Guilt-Free Dessert Bliss Recipe
Step 1: Blend the Creamy Cheesecake Filling
Grab a high-powered blender and toss in the cottage cheese, fat-free cream cheese, protein powder, sugar-free maple syrup, and a splash of vanilla extract. Blend these together until you have a luxuriously smooth mixture, typically about 1 to 2 minutes. This creamy blend is the star of the show, bringing that classic cheesecake feel while packing in protein and keeping it light.
Step 2: Prepare the Crunchy Crust
Next, it’s time to create the crust that adds a wonderful texture contrast. Take your graham crackers and pulse them in a food processor or put them in a sturdy zip-top bag and crush with a rolling pin until you have fine crumbs. Mix those crumbs with melted butter until the mixture sticks together nicely in clusters—this will give your dessert that perfect buttery crunch.
Step 3: Assemble the Jars
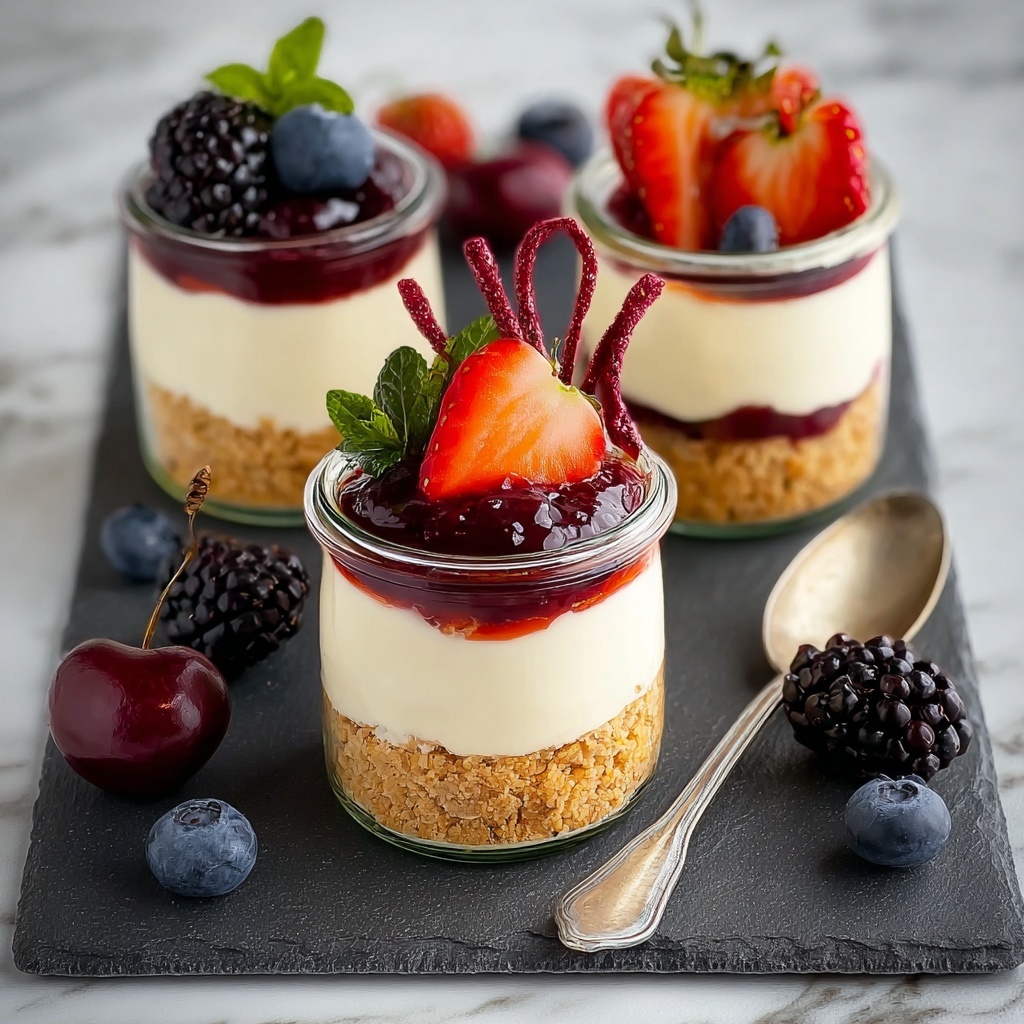
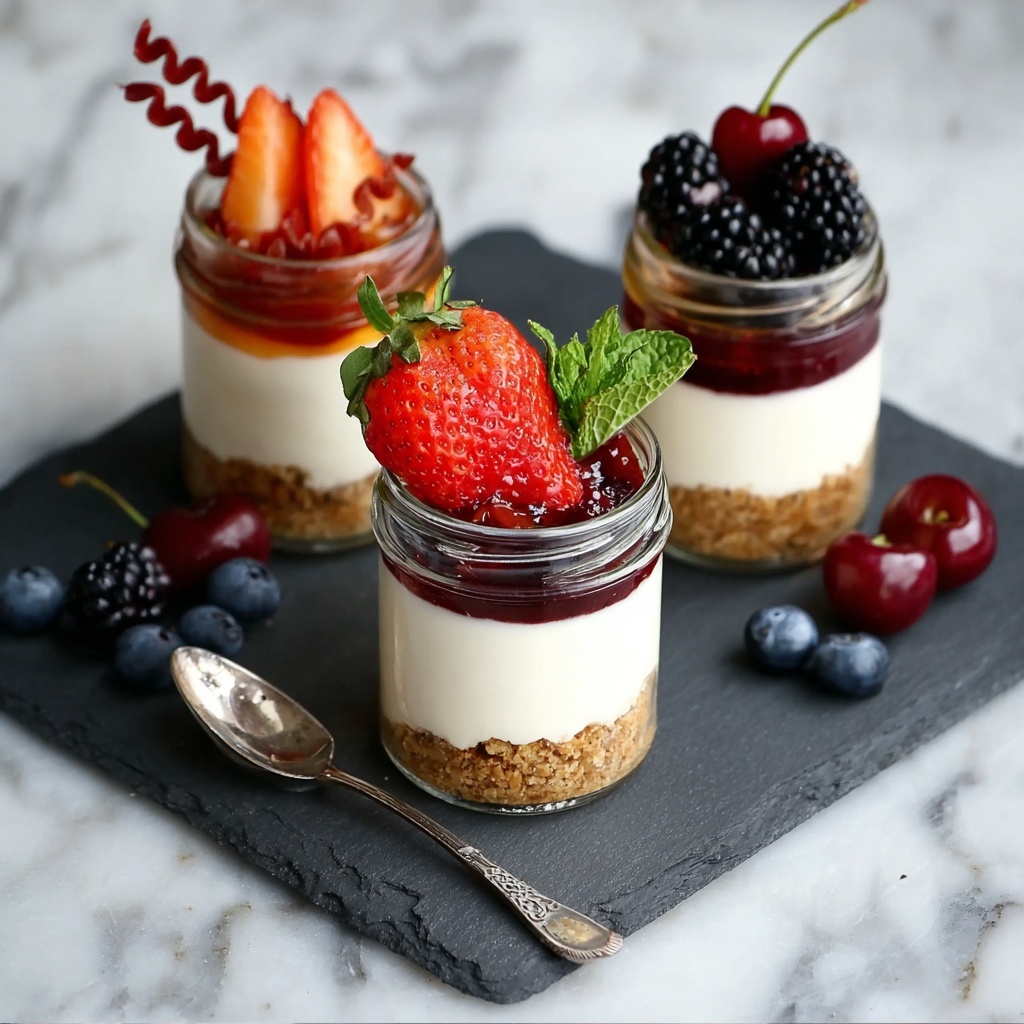
Now for the fun part: assembling these little jars of joy. Evenly divide the graham cracker crust mixture into small jars, pressing gently to form a compact base. Then spoon your creamy cheesecake filling precisely on top, smoothing it out for an inviting appearance. These layers set the stage for a delightful bite every time.
Step 4: Chill to Perfection
Refrigeration is key for dialing in the flavors and firming up the texture. Pop your jars into the fridge for at least 1 to 2 hours. For the absolute best consistency and depth of flavor, letting them chill overnight is a game changer. This step lets all the ingredients meld together beautifully.
Step 5: Add Fresh Fruit and Optional Jam
Right before serving, crown your jars with a colorful mix of fresh fruits—berries, banana slices, or any seasonal favorites work wonders. If you’re feeling extra fancy, add a spoonful of blueberry jam on top for that sweet-tart finish. This step brings freshness and a pop of color to your dessert bliss.
How to Serve Protein Cottage Cheesecake Jars: Guilt-Free Dessert Bliss Recipe
Garnishes
The garnishes are your playground for creativity while enhancing both flavor and presentation. Think vibrant berries sprinkled on top or a light dusting of cinnamon or cocoa powder to complement the vanilla base. A sprig of fresh mint can elevate the jars into something truly elegant and inviting.
Side Dishes
Though these jars shine solo, pairing them with a crisp cup of herbal tea or a light fruit salad amps up the dessert experience. These refreshing companions balance the creaminess of the jars and provide variation without overwhelming your palate.
Creative Ways to Present
Presentation matters, especially with such a charming dessert. Try layering the jars in clear glass containers to showcase the crust and creamy layers beautifully. Using mini mason jars or delicate dessert glasses adds an adorable touch perfect for parties or gifting. Adding a ribbon or personalized tag can turn these jars into edible gifts that wow everyone.
Make Ahead and Storage
Storing Leftovers
Leftover cheesecake jars store wonderfully in the fridge for up to 3 days. Just keep them covered tightly with lids or plastic wrap to maintain freshness and prevent absorption of other fridge odors. They’re a perfect grab-and-go treat for busy days.
Freezing
If you want to save time in the future, these jars can be frozen, although the texture of fresh fruits on top might change slightly. Freeze them without the garnishes in airtight containers for up to 1 month. Thaw overnight in the fridge before serving, then add fresh fruit just before enjoying.
Reheating
Since this dessert is best served chilled, avoid reheating. Instead, enjoy it straight from the fridge for that creamy and refreshing sensation that makes it so irresistible.
FAQs
Can I use a different type of protein powder?
Absolutely! While vanilla-flavored protein powder works beautifully here, you can experiment with chocolate, strawberry, or even unflavored protein powders depending on your taste preferences and dietary needs. Just keep in mind the flavor may influence the final taste.
Is this recipe suitable for vegans?
Yes, with a few swaps. Use dairy-free ricotta or cottage cheese alternatives, plant-based cream cheese, and coconut oil instead of butter. Make sure your protein powder is plant-based and use sugar-free or vegan-friendly sweeteners to keep it fully vegan.
How can I make this dessert more indulgent without adding too many calories?
Try topping your jars with fresh fruit and a dollop of light whipped cream or some shaved dark chocolate for a decadent touch that still keeps the dessert relatively guilt-free. Using sugar-free jams or syrups also boosts sweetness without extra calories.
Can I prepare this recipe without a blender?
Using a blender helps achieve the smoothest cheesecake texture, but if you don’t have one, you can try mixing the ingredients by hand vigorously or with a food processor. Just expect a slightly chunkier texture, which can still be delicious.
What is the best way to serve these jars for a party?
Serve them chilled in individual jars or small glasses arranged on a lovely tray or tiered stand. Garnish each with fresh fruit and maybe a sprig of mint or edible flowers to impress your guests with both flavor and presentation.
Final Thoughts
I can’t recommend this Protein Cottage Cheesecake Jars: Guilt-Free Dessert Bliss Recipe enough for anyone craving a dessert that feels indulgent yet nourishing. It’s simple to make, pleasing to the eye, and keeps you energized with all that protein. Whether you’re treating yourself or sharing with friends, these jars are a delightful way to enjoy your dessert without hesitation. Give it a try and watch it become your go-to sweet treat!
Print
Protein Cottage Cheesecake Jars: Guilt-Free Dessert Bliss Recipe
- Prep Time: 15 minutes
- Cook Time: 0 minutes
- Total Time: 2 hours 15 minutes
- Yield: 4 servings
- Category: Dessert
- Method: Blending
- Cuisine: American
- Diet: Low Fat
Description
Delight in these Protein Cottage Cheesecake Jars, a guilt-free, high-protein dessert perfect for a healthy treat. This recipe combines creamy cottage cheese and fat-free cream cheese with vanilla protein powder and a sugar-free maple syrup sweetener, layered over a crunchy graham cracker crust, topped with fresh fruits and optional blueberry jam for a burst of flavor. Ideal for anyone craving a nutritious yet indulgent dessert that’s easy to prepare and customizable to various dietary needs.
Ingredients
Cheesecake Filling
- 1 cup Cottage Cheese (Use dairy-free ricotta for vegan version)
- 8 oz Fat-Free Cream Cheese (Substitute with plant-based cream cheese for dairy-free option)
- 1 scoop Vanilla-Flavored Protein Powder (Consider chocolate flavor for variation)
- 2 tbsp Sugar-Free Maple Syrup (Can be substituted with regular maple syrup)
- 1 splash Vanilla Extract
Crust
- 1 cup Graham Crackers (or crumbs) (Use gluten-free graham crackers for gluten restrictions)
- 3 tbsp Melted Butter (Coconut oil can be used for dairy-free option)
Toppings
- 1 cup Fresh Fruits (Top with berries, bananas, or seasonal fruits)
- 2 tbsp Blueberry Jam (Optional; sugar-free alternatives can be used)
Instructions
- Blend the Filling: In a high-power blender, combine the cottage cheese, fat-free cream cheese, vanilla-flavored protein powder, sugar-free maple syrup, and a splash of vanilla extract. Blend until smooth and creamy, which should take about 1-2 minutes.
- Prepare the Crust: Crush the graham crackers into fine crumbs using a food processor or place them in a zip-top bag and crush with a rolling pin. Mix these crumbs thoroughly with the melted butter until the mixture forms clusters and is evenly combined.
- Assemble the Jars: Evenly distribute the crust mixture into the bottom of small jars, pressing down gently to form a compact base layer. Spoon the creamy cheesecake filling over the crust and smooth the surface for an even finish.
- Chill the Cheesecakes: Place the jars in the refrigerator for at least 1-2 hours to allow the cheesecake to set. For optimal flavor and texture, chilling overnight is recommended.
- Add Toppings and Serve: Before serving, top each jar with your choice of fresh fruit and a spoonful of optional blueberry jam to enhance both taste and presentation.
Notes
- For a vegan version, substitute cottage cheese and cream cheese with dairy-free ricotta and plant-based cream cheese respectively.
- Use gluten-free graham crackers if you need to avoid gluten.
- For a dairy-free option, replace melted butter with coconut oil.
- Adjust sweetness by choosing sugar-free or regular maple syrup according to dietary preference.
- Protein powder flavor can be varied to chocolate or other preferred flavors for a different twist.
- Chilling overnight improves texture and depth of flavor, but 1-2 hours is sufficient for a quick dessert.

