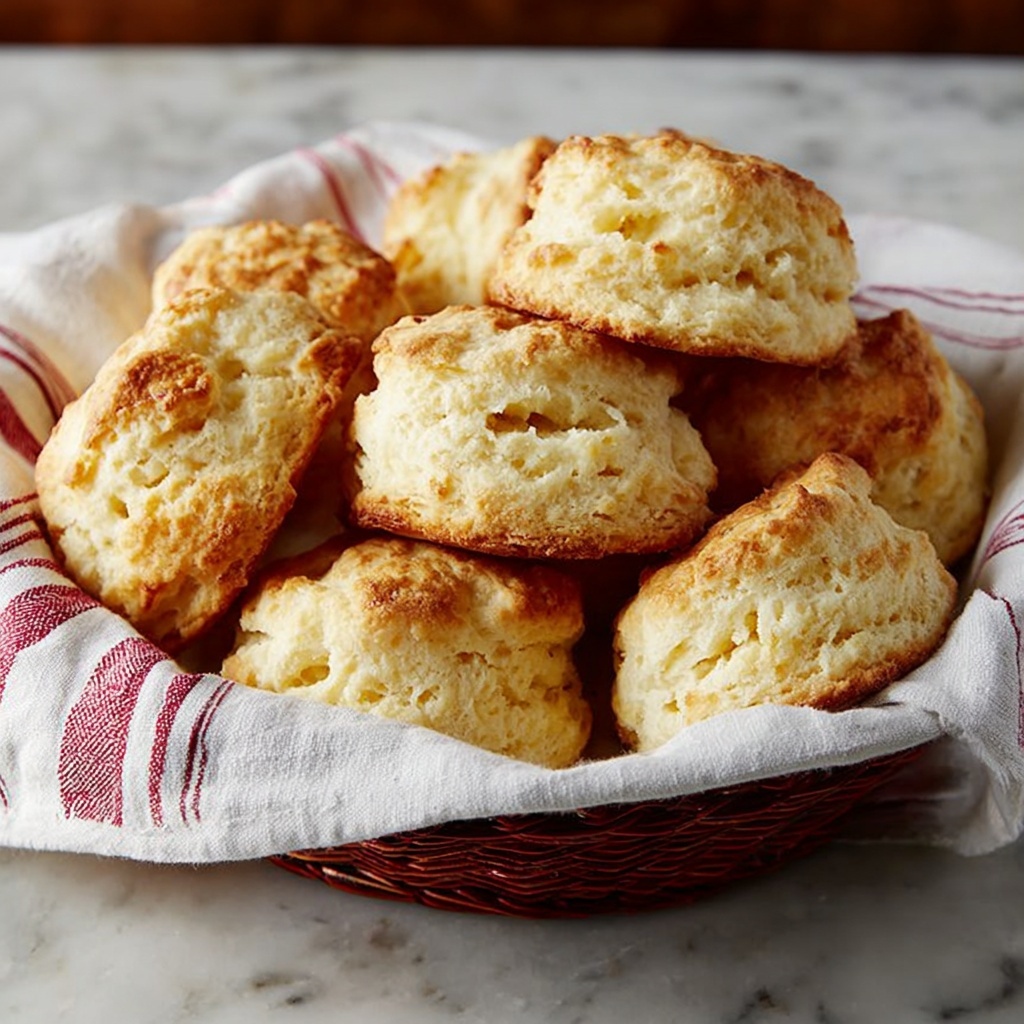
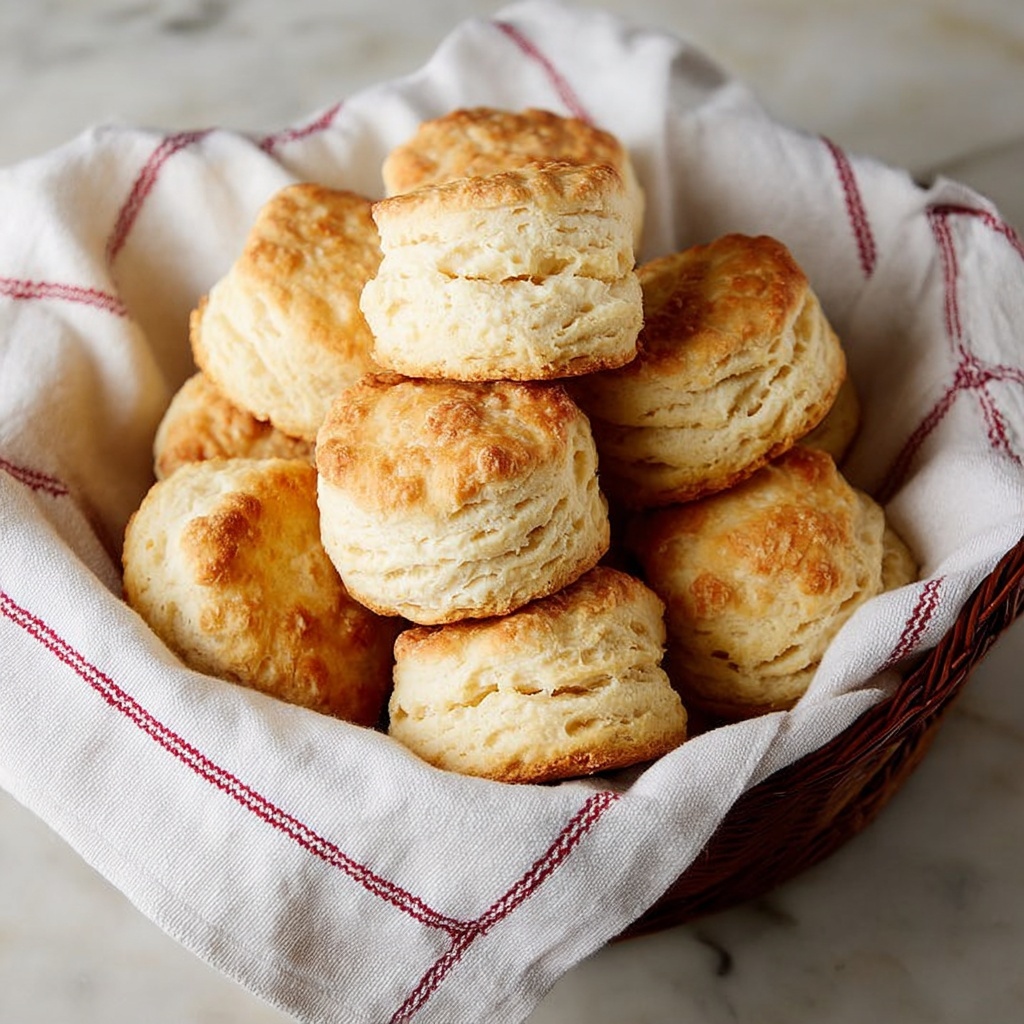
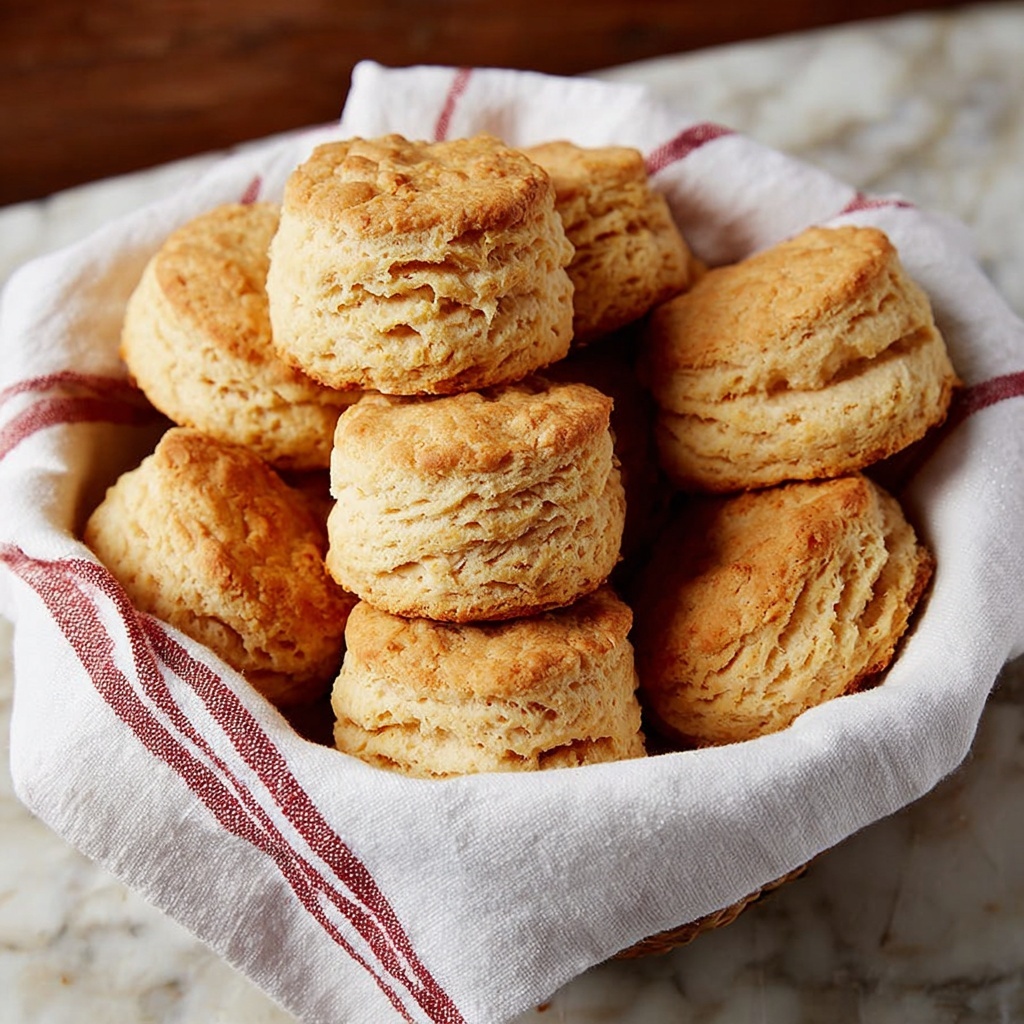
If you have ever wished for the perfect homemade biscuit that wraps you in warmth and comfort right from the oven, this Easy Buttermilk Biscuits Recipe is absolutely for you. Imagine tender, flaky layers that melt in your mouth and a golden crust that’s just begging to be slathered with butter or honey. These biscuits come together with minimal fuss, using simple ingredients that blend into something truly magical. Whether it’s a weekend brunch or a cozy dinner side, you will find yourself reaching for this recipe again and again.
Ingredients You’ll Need
Creating these biscuits requires just a handful of ingredients, each serving a key role in achieving that signature tender crumb and flaky texture. The beauty lies in their simplicity and how they work together to bring out that delightful biscuit flavor and color.
- 2 cups White Lily Self-Rising Flour: This tender wheat flour is the secret to light, fluffy biscuits because of its lower protein content.
- 1/2 cup cold unsalted butter: Cold butter creates flaky layers by forming pockets of steam as it melts during baking.
- 3/4 cup cultured nonfat buttermilk: Adds a slight tang and reacts with the flour for a tender, moist crumb.
- 2 tablespoons unsalted butter, melted: Brushing this on top ensures a golden, shiny finish and adds richness.
How to Make Easy Buttermilk Biscuits Recipe
Step 1: Prep Your Oven and Baking Surface
Start by preheating your oven to a high 450°F temperature. Line your baking pan with a silicone mat or parchment paper to prevent sticking and make cleanup a breeze. This high heat is what helps create the tender yet golden crust these biscuits are known for.
Step 2: Measure and Combine the Dry Ingredients
Accurate measurement sets your biscuits up for success. Gently spoon 2 cups of White Lily Self-Rising Flour into your measuring cup and level it off. This technique avoids compacting the flour for lighter biscuits.
Step 3: Cut Butter into Flour
Bring the magic of flaky layers by cutting cold unsalted butter into the flour using a pastry blender until the pieces are about the size of small peas. For an easier twist, pop the butter in the freezer and grate it, then mix with the flour. This method distributes the butter evenly without melting it, which is key.
Step 4: Add Buttermilk and Form Dough
Pour in the cultured nonfat buttermilk and stir gently just until the dough starts to come together. It should resemble thick mashed potatoes—moist but not sticky. If it feels too wet, sprinkle a little flour; if too dry, add a splash more buttermilk. The goal is tender, workable dough.
Step 5: The Tri-Fold Technique for Flakiness
Turn your dough onto a floured surface and lightly knead if it’s not holding together. Now, flatten it into a rectangle and fold it into thirds like a letter. Repeat this folding process three times, dusting with flour as needed to prevent sticking. This folding builds those beautiful flaky layers that make biscuits so irresistible.
Step 6: Cut and Arrange the Biscuits
Press the dough into a rectangle about 3/4 to 1 inch thick. Using a floured biscuit cutter between 2 and 2 1/2 inches, cut straight down without twisting to keep the edges clean and help the biscuits rise evenly. Place the cut biscuits close together on your baking pan for soft edges, or spaced apart if you prefer a crunchier crust.
Step 7: Bake to Golden Perfection
Re-shape the leftover dough and cut out more biscuits until you have 10 to 12 in total. Brush melted butter on top generously to promote a golden color, then pop them into your preheated oven. Bake for around 15 minutes until your kitchen is filled with that heavenly aroma and the biscuits are beautifully golden on top.
How to Serve Easy Buttermilk Biscuits Recipe
Garnishes
Simple garnishes like a pat of butter, a drizzle of honey, or a dollop of jam can elevate these biscuits to new levels of deliciousness. For a savory twist, top warm biscuits with flaky sea salt, fresh herbs like chives, or a spread of sharp cheddar cheese.
Side Dishes
These biscuits pair wonderfully with classic Southern comforts such as creamy gravy, crispy fried chicken, or a hearty bowl of soup. Their soft, flaky qualities complement both rich and light dishes beautifully, making them a versatile star at any meal.
Creative Ways to Present
Make your biscuit moments memorable by turning them into appetizers—slice them open and fill with smoked salmon and cream cheese or ham and mustard. Or transform leftovers into breakfast sandwiches with eggs, cheese, and bacon for a scrumptious start to the day.
Make Ahead and Storage
Storing Leftovers
Store leftover biscuits in an airtight container at room temperature for up to 2 days. Keep them away from moisture to retain their flaky texture. A quick reheat before serving brings back that freshly baked magic.
Freezing
If you want to save some for later, these biscuits freeze beautifully. Wrap them tightly in plastic wrap and then place in a freezer bag. They can be frozen for up to 2 months without losing their delightful texture and flavor.
Reheating
Reheat frozen or day-old biscuits by wrapping them in foil and warming them in a 350°F oven for 10 to 15 minutes. For a crispier finish, unwrap them during the last few minutes of reheating. Microwave reheating works for convenience but may soften the crust.
FAQs
What makes this an Easy Buttermilk Biscuits Recipe?
This recipe uses a simple ingredient list and straightforward techniques like the tri-fold method that anyone can master, delivering flaky, tender biscuits without complicated steps or hard-to-find ingredients.
Can I use regular flour instead of self-rising flour?
Yes, but you’ll need to add 1 1/2 teaspoons baking powder and 1/2 teaspoon salt per 2 cups of all-purpose flour to mimic self-rising flour for good rise and flavor.
What if I don’t have cultured buttermilk?
You can make a substitute by adding 1 tablespoon of lemon juice or white vinegar to 3/4 cup milk. Let it sit for 5 minutes, then use it in place of cultured buttermilk for a similar tang and texture.
How important is cold butter in this recipe?
Very important! Cold butter creates the flaky layers by releasing steam during baking. Using room temperature butter results in a denser biscuit.
Can I make these biscuits dairy-free?
To make them dairy-free, substitute the butter with a dairy-free margarine and use a plant-based milk with a splash of lemon juice or vinegar instead of buttermilk. The texture may vary slightly but still delicious.
Final Thoughts
There is just something truly satisfying about pulling hot, golden biscuits fresh from the oven, and this Easy Buttermilk Biscuits Recipe delivers that comfort and joy effortlessly. From the buttery flakes to the tender crumb, it’s a recipe that invites you to slow down, savor, and share with loved ones. So why not give it a try? Your perfect biscuit moment is just minutes away.
Print
Easy Buttermilk Biscuits Recipe
- Prep Time: 15 minutes
- Cook Time: 15 minutes
- Total Time: 30 minutes
- Yield: 10 to 12 biscuits
- Category: Baking
- Method: Baking
- Cuisine: American
- Diet: Vegetarian
Description
These Easy Buttermilk Biscuits are tender, flaky, and perfect for breakfast or any meal. Made with just a few simple ingredients like self-rising flour, cold butter, and cultured buttermilk, this recipe is straightforward and yields soft biscuits with golden, buttery tops. The tri-fold layering technique helps create those classic flaky layers, while baking at a high temperature ensures a golden crust with a fluffy interior.
Ingredients
Dry Ingredients
- 2 cups White Lily Self-Rising Flour
Wet Ingredients
- 3/4 cup cultured nonfat buttermilk
- 1/2 cup cold unsalted butter
- 2 tablespoons unsalted butter, melted (for brushing)
Instructions
- Preheat and prepare baking surface: Preheat your oven to 450°F (232°C) and line a baking pan with a silicone baking mat or parchment paper to prevent sticking.
- Measure the flour: Spoon the self-rising flour into a dry measuring cup and level it off for accuracy to avoid dense biscuits.
- Cut butter into flour: Using a pastry blender, cut the cold butter into the flour until the pieces resemble small peas. Alternatively, freeze the butter and grate it with a box grater, then mix with the flour.
- Add buttermilk and mix dough: Pour in the cultured nonfat buttermilk and stir until just combined. The dough should feel like thick mashed potatoes — not overly sticky. Adjust with more flour or buttermilk as needed to reach the correct consistency.
- Knead and create layers: Turn the dough onto a floured surface. Knead gently a few times if necessary to bring it together. Flatten into a rectangle, then fold it into thirds like a letter (tri-fold). Repeat this folding and flattening process about three times, dusting with flour to prevent sticking. This technique helps create flaky layers.
- Cut biscuits: Flatten the final dough into a rectangle roughly 3/4 to 1 inch thick. Using a sharp, floured biscuit cutter (2 to 2.5 inches in diameter), cut out biscuits with a straight up-and-down motion, avoiding twisting. Place biscuits close together on the prepared baking pan for softer edges, or spaced apart for crunchier ones.
- Re-roll and cut more biscuits: Gather the scraps, gently re-flatten, and cut additional biscuits. Expect to get 10 to 12 biscuits in total.
- Brush and bake: Brush the biscuit tops with melted unsalted butter. Bake in the preheated oven for about 15 minutes, or until the tops turn golden brown and the biscuits are cooked through.
Notes
- Use cold butter to ensure flaky layers in the biscuits.
- Do not twist the biscuit cutter when cutting; this can seal the edges and inhibit rising.
- Adjust flour and buttermilk quantities slightly to get the right dough consistency, depending on humidity and flour brand.
- Placing biscuits close together while baking results in softer sides, while spacing them apart will yield crispier edges.
- Leftover biscuits can be reheated in a low oven or toaster oven to restore freshness.
