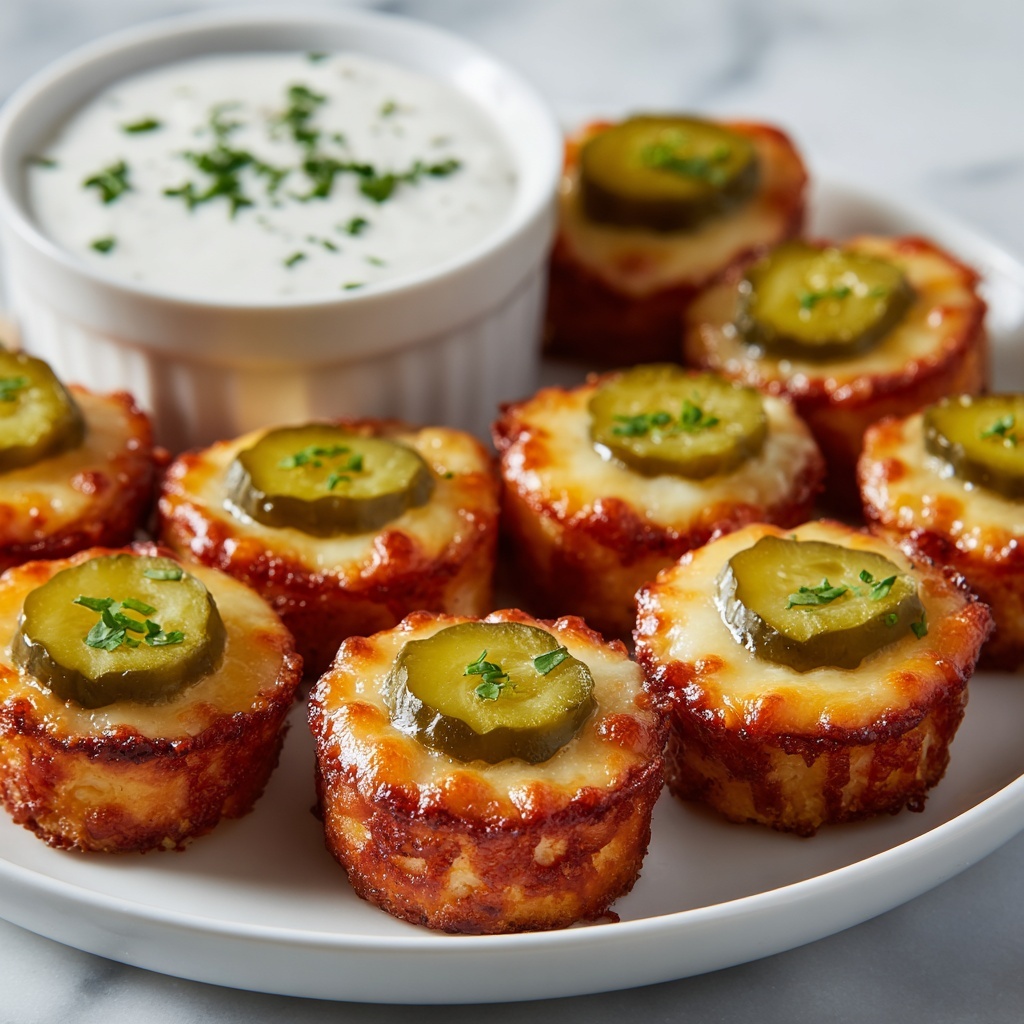
If you’re looking for a snack that sings with bold flavors and melts your heart with ooey-gooey goodness, this Cheesy Pickle Chips Recipe is exactly what you need. Picture tangy dill pickle chips nestled under a blanket of bubbling cheddar, dusted with zesty ranch seasoning, and baked to crispy, golden perfection. It’s the kind of treat that brings an addictive crunch with every bite, combining sharp cheesiness and pickle’s bright zing in a way that feels utterly comforting yet irresistibly fun. Trust me, once you try this Cheesy Pickle Chips Recipe, it’ll become your go-to snack for game days, party platters, or just indulging your cravings.
Ingredients You’ll Need
The magic of this Cheesy Pickle Chips Recipe lies in its simplicity and the powerhouse ingredients each playing a crucial role. You only need a few pantry staples, but together, they create a flavor-packed snack with the perfect balance of tang, creaminess, and crispy texture.
- Dill Pickle Chips: These are the star, providing that signature briny crunch that contrasts beautifully with the creamy cheese.
- Shredded Cheese: Choose sharp cheddar or a cheese blend for rich, melty goodness that bubbles up and crisps perfectly.
- Dry Ranch Seasoning: Adds a savory punch and herbaceous note that perfectly complements the pickles and cheese.
How to Make Cheesy Pickle Chips Recipe
Step 1: Preheat Oven
Start by heating your oven to 350 degrees Fahrenheit (175°C). This temperature is just right for melting the cheese without burning it, setting the stage for those perfectly crisped edges.
Step 2: Prepare Pickles
Drain the dill pickle hamburger chips well, then pat them dry thoroughly with paper towels. Moisture is the enemy here; drying them ensures that the cheese crisps up nicely without getting soggy underneath.
Step 3: Layer Cheese in Mini Muffin Pan
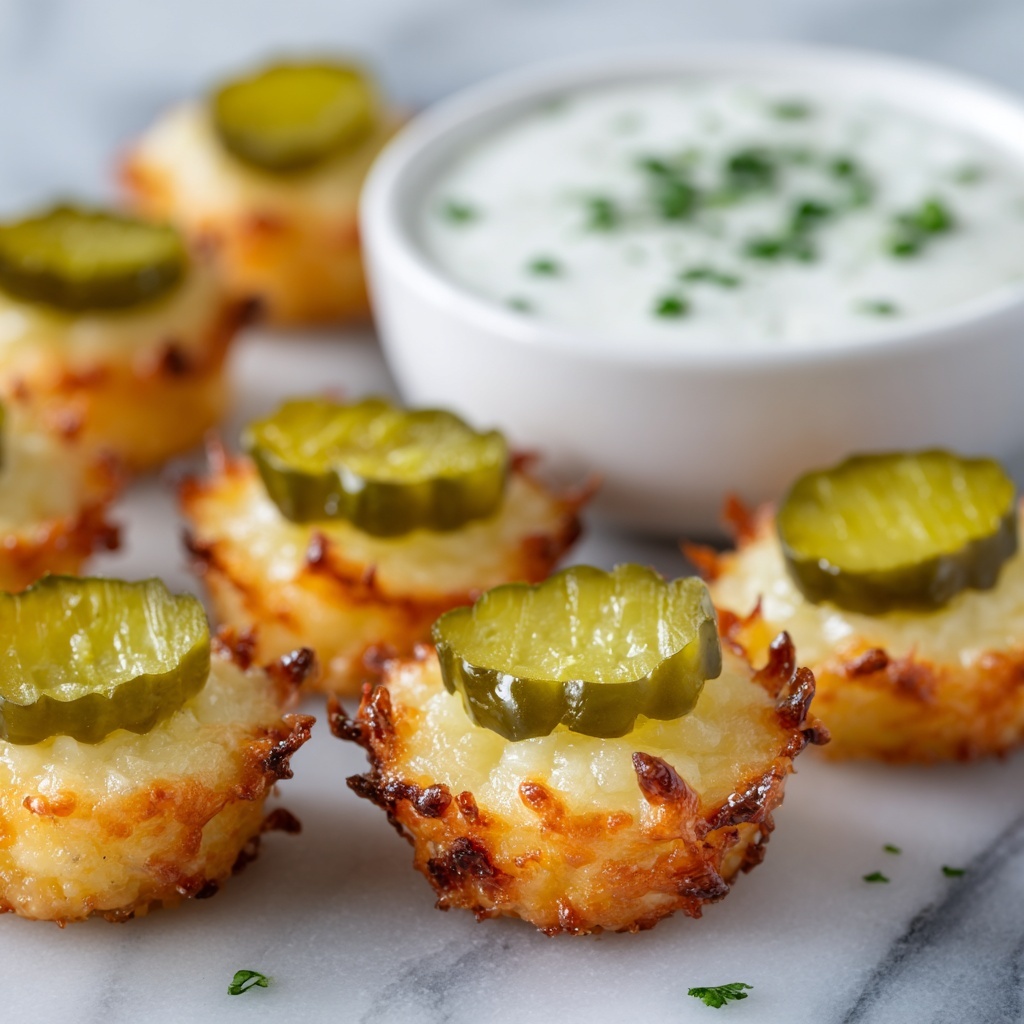
Grab a mini muffin tin and sprinkle about 1 tablespoon of shredded cheese into each cup. This creates a solid cheesy base that bakes into a crispy little cheese crisp you’ll love.
Step 4: Add Pickle Chips
Place one dried dill pickle chip gently on top of the cheese layer in each muffin cup. This layering lets the flavors mingle as the cheese melts around the pickle.
Step 5: Season and Top with More Cheese
Sprinkle approximately 1 teaspoon of dry ranch seasoning evenly over each pickle chip. Then add about ½ teaspoon of shredded cheese on top. This extra cheese topping ensures a golden, bubbly finish with that unmistakable savory kick.
Step 6: Bake
Put the muffin pan in your preheated oven and bake for roughly 6 minutes. Keep an eye out for the cheese to turn a lovely golden brown with bubbling edges—that’s your cue that they’re ready.
Step 7: Cool and Crisp
Once baked, take the pan out and allow the pickle chips to cool for a few minutes. Then carefully transfer each chip onto paper towels to air out and crisp up even more as they cool down to the perfect crunchy texture.
Step 8: Serve and Enjoy
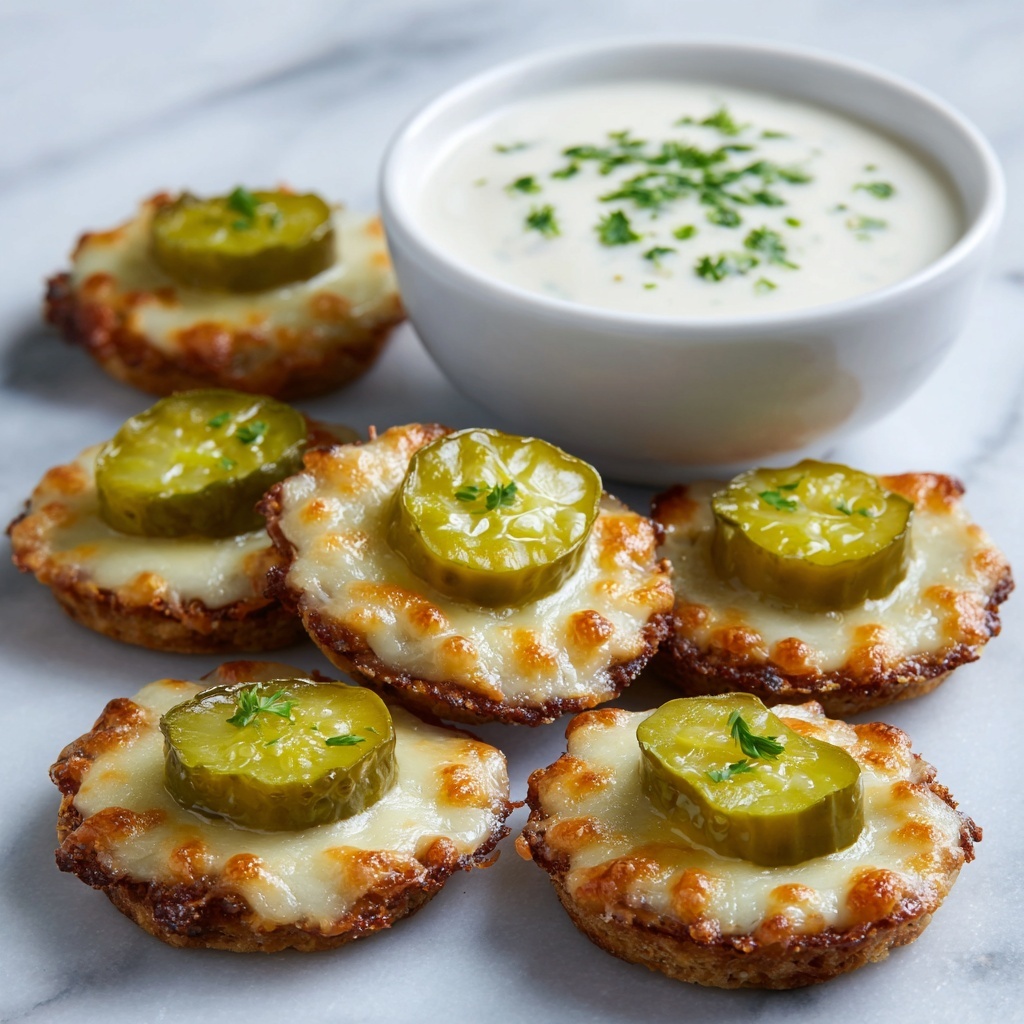
Serve these irresistible bites warm or at room temperature. They are fantastic on their own or alongside your favorite dips for an extra flavor boost.
How to Serve Cheesy Pickle Chips Recipe
Garnishes
For a beautiful and tasty touch, try sprinkling some fresh chopped chives, parsley, or even a light drizzle of spicy sriracha mayo. These garnishes add color, freshness, and a little zing that elevates the experience.
Side Dishes
This snack shines alongside creamy ranch dip, spicy aioli, or even a tangy blue cheese dressing. If you’re putting together a spread, consider serving alongside crispy fries, sliders, or a fresh garden salad for balance.
Creative Ways to Present
If you want to impress your guests or make these cheesy pickle chips the star of your party, serve them on a charcuterie board with meats, nuts, and fresh veggies. You can also stack a few on mini skewers with cherry tomatoes and olives for a fun, bite-sized appetizer.
Make Ahead and Storage
Storing Leftovers
If you have any leftovers (which may be rare), store them in an airtight container in the refrigerator for up to 2 days. To keep that great crunch, separate layers with parchment paper.
Freezing
Freezing is not ideal for this recipe because the cheese and pickles lose texture and crispness once thawed. It’s best enjoyed freshly baked for ultimate flavor and crunch.
Reheating
To bring your leftover cheesy pickle chips back to life, place them on a baking sheet in a 350 degrees Fahrenheit oven for about 5 minutes. This reheating method revives the crisp texture without drying out the cheese.
FAQs
Can I use different types of cheese for this recipe?
Absolutely! While cheddar is classic and delicious, using mozzarella, pepper jack, or a cheese blend can add unique flavors and textures. Just make sure the cheese melts well.
What if I don’t have a mini muffin pan?
You can use a regular baking sheet lined with parchment paper. Just spread cheese mounds, place the pickle chip on top, and season as usual. Keep an eye on baking time since it may vary slightly.
Are these suitable for meal prep or parties?
Yes! They’re perfect finger foods for gatherings and can be quickly reheated to refresh their crispness. Just prepare them close to serving time for the best texture.
Can I make these vegan or dairy-free?
For a vegan twist, use plant-based cheese that melts well and ensure your ranch seasoning is dairy-free. The flavor and fun crunch will still shine through!
Is there a way to make these less salty?
You could rinse the pickle chips lightly and pat them thoroughly dry to reduce excess salt. Also, experiment with less ranch seasoning or a low-sodium variety to balance flavors.
Final Thoughts
This Cheesy Pickle Chips Recipe is a total game-changer when it comes to snacking. It’s simple, quick, and packed with such an addictive combination of flavors that it will easily become a new favorite to whip up anytime you need that perfect salty, cheesy crunch. Go ahead and give this recipe a try—you won’t regret it!
Print
Cheesy Pickle Chips Recipe
- Prep Time: 5 minutes
- Cook Time: 6 minutes
- Total Time: 11 minutes
- Yield: 24 servings
- Category: Snack
- Method: Baking
- Cuisine: American
Description
Crispy and savory Cheesy Pickle Chips baked to perfection with a delightful ranch seasoning, perfect as a snack or party appetizer.
Ingredients
Pickle Chips
- 24 dill pickle hamburger chips
Cheese
- 2 cups shredded cheese (cheddar or blend)
Seasoning
- 3 tbsp dry ranch seasoning (from a packet)
Instructions
- Preheat Oven: Preheat your oven to 350 degrees F (175°C) to prepare for baking the chips.
- Prepare Pickles: Drain the dill pickle chips and pat them dry thoroughly with paper towels. This step helps the cheese crisp up and prevents sogginess.
- Layer Cheese: Using a mini muffin pan, sprinkle about 1 tablespoon of shredded cheese into each tin, creating a base for the chips.
- Add Pickles: Place one dill pickle chip on top of the shredded cheese in each muffin tin.
- Season & Top with Cheese: Evenly sprinkle dry ranch seasoning over each pickle chip. Then add about ½ teaspoon more shredded cheese on top of each chip, ensuring extra cheesy flavor.
- Bake: Place the mini muffin pan in the preheated oven and bake for about 6 minutes or until the cheese turns brown and begins to bubble.
- Cool & Crisp: Remove the pan from the oven and let the chips cool for a few minutes. Then transfer each chip onto a paper towel to allow them to crisp up further as they cool.
- Serve: Enjoy the Cheesy Pickle Chips plain or paired with your favorite dip for added flavor.
Notes
- Patting the pickles dry is essential to ensure crispiness.
- Use a mini muffin pan to keep the shape and contain cheese for each chip.
- Serve warm for best texture and flavor.
- Try different cheese blends for varying flavors.

