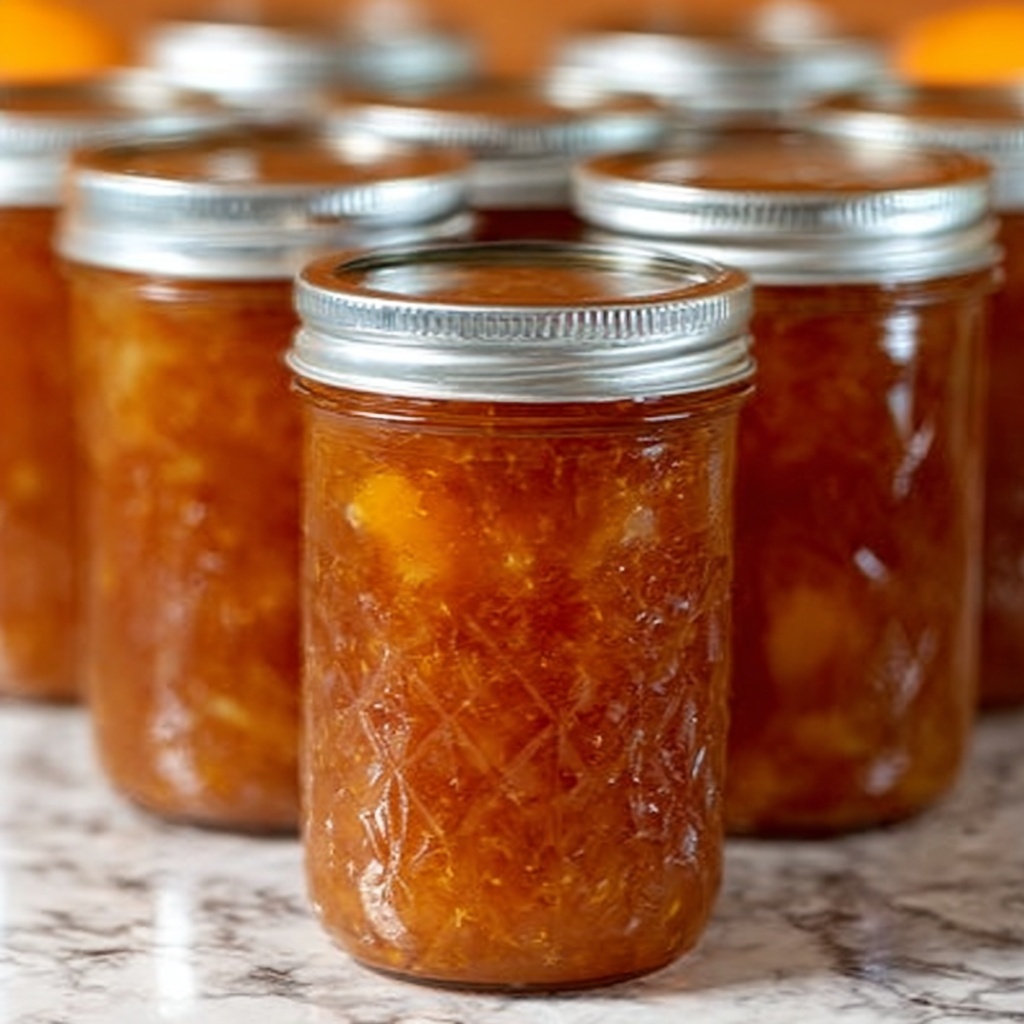
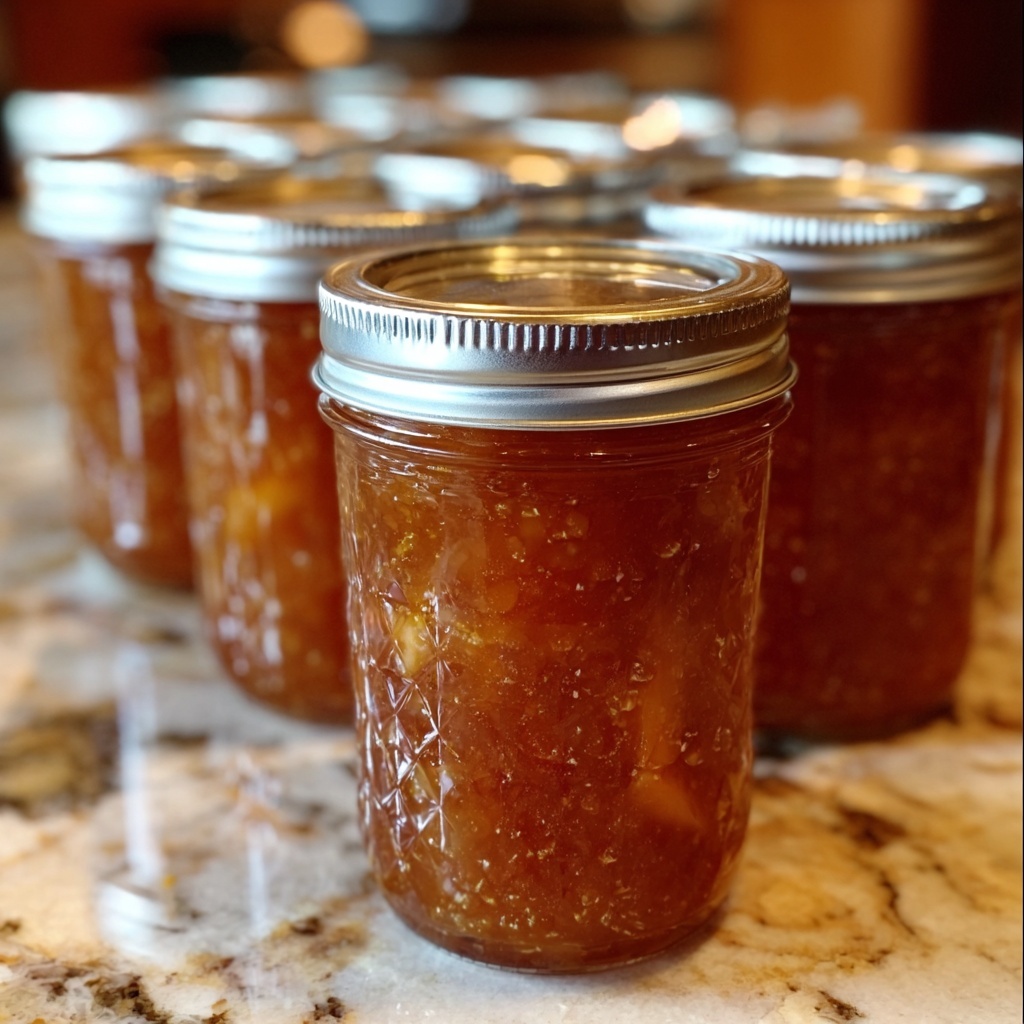
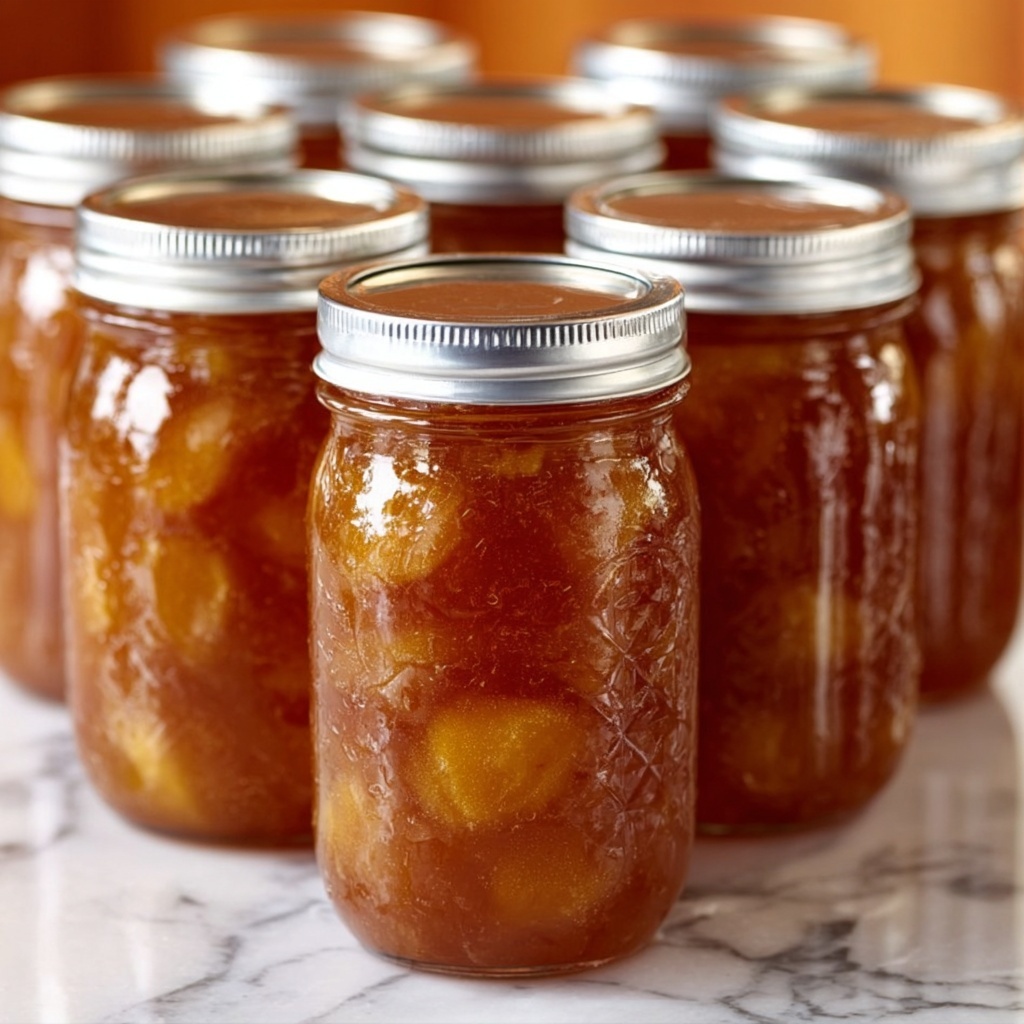
There is something truly magical about the comforting blend of sweet caramel and tart apples coming together in a homemade preserve that feels like a warm hug in every spoonful. This Caramel Apple Jam Recipe captures that essence perfectly, offering a luscious, spiced jam that’s bursting with cozy fall flavors. Whether you’re spreading it on toast or swirling it into yogurt, this jam turns everyday moments into celebrations of autumn’s finest tastes with minimal fuss and maximum delight.
Ingredients You’ll Need
This recipe calls for a handful of straightforward ingredients, each playing a crucial role in building the rich flavor, beautiful texture, and warm color of the jam. From the fresh apples to the blend of sugars and spices, every item is carefully chosen to highlight that irresistible caramel-apple flavor.
- Apples, 4 cups peeled, cored, and finely chopped: Choose crisp, tart apples like Granny Smith or Fuji for the perfect balance and texture.
- Lemon juice, 2 tablespoons: Adds brightness and helps preserve the natural color of the apples.
- Apple cider or water, 1 cup: Provides the simmering liquid that softens the apples and infuses a delicate fruity note.
- Ground cinnamon, 1 teaspoon: A warm spice that brings classic fall charm to the jam.
- Ground nutmeg, 1/4 teaspoon: Adds subtle depth and a hint of cozy spice.
- Salt, 1/4 teaspoon: Enhances the overall flavors and balances the sweetness.
- Powdered fruit pectin, 1 box (1.75 oz): Essential for achieving that perfect jam-like consistency without any extra fuss.
- Granulated sugar, 4 cups: Sweetens and helps the jam set beautifully.
- Light brown sugar, 1/2 cup packed: Brings that rich caramel undertone that defines this recipe.
- Unsalted butter, 1/4 cup (optional): Helps reduce foaming during cooking and adds a subtle silkiness to the jam.
How to Make Caramel Apple Jam Recipe
Step 1: Prepare and Simmer the Apples
Start by peeling, coring, and finely chopping about 4 to 5 medium apples—this fresh foundation makes all the difference. Combine the chopped apples with lemon juice, apple cider, cinnamon, nutmeg, and salt in a large pot or Dutch oven. Bring the mixture to a gentle simmer over medium heat, letting the apples soften and the flavors meld for about 10 minutes. This step tenderizes the apples and infuses the warm spices deeply into the fruit.
Step 2: Add Pectin and Boil
Once your apples are tender, stir in the powdered fruit pectin. Then, crank up the heat and bring the mixture to a vigorous rolling boil, stirring constantly. This is key to activating the pectin’s setting power, ensuring your jam will have that delightful, spreadable consistency you crave.
Step 3: Incorporate Sugars and Finish Boiling
At the height of the boil, add the granulated and brown sugars all at once. Return to a hard boil and keep stirring for one full minute. This technique locks in the sweetness and caramel flavor while guaranteeing your jam will set perfectly without crystallizing or burning.
Step 4: Remove Foam and Add Butter
Take your pot off the heat and skim off any excess foam that forms on top. If you’re using butter, stir it in now to help reduce foaming and add a touch of silky richness, creating that signature caramel texture.
Step 5: Jar and Process
Ladle the hot jam carefully into sterilized jars, leaving about 1/4 inch of headspace. Wipe rims clean before sealing with lids and rings. To ensure safety and longevity, process the jars in a boiling water bath for 10 minutes, adjusting for your altitude if needed. Let the jam cool completely before storing, allowing it to thicken as it chills.
How to Serve Caramel Apple Jam Recipe
Garnishes
Sprinkle a bit of extra ground cinnamon or finely chopped toasted pecans atop a warm spoonful for added texture and visual appeal. A tiny drizzle of honey can also enhance the natural sweetness while giving a beautiful sheen to the jam when served.
Side Dishes
This jam pairs wonderfully with breakfast staples like buttery toast, fluffy pancakes, or creamy oatmeal. It’s also a fantastic companion to rich cheeses like brie or sharp cheddar, making it a sweet highlight on any charcuterie board.
Creative Ways to Present
Get playful by using the jam as a filling for pastries, swirl it into your yogurt or ice cream, or layer it inside cakes and tarts for a harvest-inspired dessert that impresses guests. In a pinch, it can even jazz up your grilled cheese sandwich for a sweet and savory twist!
Make Ahead and Storage
Storing Leftovers
If you happen to have any leftover jam after your first round of indulgence, no worries. Store it in airtight jars or containers in the refrigerator where it will stay fresh and flavorful for up to three weeks. The pectin ensures it keeps its luscious consistency without separating.
Freezing
For longer-term storage, you can freeze the jam in freezer-safe containers. This method preserves the jam’s essence, allowing you to enjoy your favorite Caramel Apple Jam Recipe even months after the apple season ends—you’ll just want to thaw it slowly in the fridge beforehand.
Reheating
To bring your jam back to life after storage, gently warm it in a saucepan over low heat, stirring occasionally. This reheating refreshes the silky texture and makes it easy to spread, scoop, or drizzle once again.
FAQs
Can I use different types of apples for this recipe?
Absolutely! While tart apples like Granny Smith give a nice balance to the sweetness, you can mix in sweeter varieties like Fuji or Honeycrisp for a nuanced flavor. Just make sure the apples are firm and fresh for the best texture.
Is the butter necessary in the recipe?
The butter is optional and primarily helps reduce foam during boiling, which can make the jam easier to handle and yield a smoother texture. If you prefer, you can skip it without drastically affecting the flavor.
How long does the jam last once opened?
Once opened, store the jam in the refrigerator and use it within three weeks for peak freshness. Be sure to use a clean spoon each time to avoid contamination.
Can I make this jam without pectin?
You can, but the jam will take longer to set and might have a looser consistency. If you opt out of pectin, consider cooking the apples longer and doing a gel test to ensure proper thickening.
What altitude adjustments are needed for canning?
At higher altitudes, water boils at a lower temperature, so you’ll need to increase processing time for safe preservation. Check a trusted canning guide for your specific altitude to make accurate adjustments.
Final Thoughts
Making this Caramel Apple Jam Recipe is not just about creating a delicious spread—it’s about capturing the essence of cozy, homey moments filled with warmth and love. Once you try it, you’ll find it hard to go back to store-bought jams. So grab those apples, get your pot ready, and let this recipe bring a little touch of autumn magic to your table any time of year.
Print
Caramel Apple Jam Recipe
- Prep Time: 20 minutes
- Cook Time: 30 minutes
- Total Time: 50 minutes
- Yield: 6 half-pint jars
- Category: Condiment
- Method: Stovetop
- Cuisine: American
- Diet: Gluten Free, Vegetarian
Description
This Caramel Apple Jam combines the sweet and spiced flavors of apples, cinnamon, and nutmeg into a rich, homemade fruit spread. Perfect for fall mornings, it’s ideal on toast, pancakes, or as a delicious filling for pastries and cakes. The recipe uses a stovetop simmering and boiling technique followed by canning for preservation, resulting in a smooth, thick jam with a hint of caramel richness.
Ingredients
Fruit Base
- 4 cups peeled, cored, and finely chopped apples (about 4–5 medium apples)
- 2 tablespoons lemon juice
- 1 cup apple cider or water
Spices & Seasonings
- 1 teaspoon ground cinnamon
- 1/4 teaspoon ground nutmeg
- 1/4 teaspoon salt
Thickening & Sweeteners
- 1 (1.75 oz) box powdered fruit pectin
- 4 cups granulated sugar
- 1/2 cup packed light brown sugar
Optional
- 1/4 cup unsalted butter (optional, to reduce foaming)
Instructions
- Combine Ingredients: In a large pot or Dutch oven, combine the chopped apples, lemon juice, apple cider (or water), ground cinnamon, ground nutmeg, and salt. This base will create the flavorful foundation of your jam.
- Simmer the Apples: Bring the mixture to a simmer over medium heat and cook for about 10 minutes, or until the apples are tender. Stir occasionally to prevent sticking and to ensure even cooking.
- Add Pectin & Boil: Stir in the powdered fruit pectin thoroughly, then bring the mixture to a full rolling boil, stirring constantly to avoid burning.
- Add Sugars: Once boiling, add both the granulated sugar and light brown sugar all at once. Return the mixture to a full rolling boil and continue to boil hard for 1 minute, stirring constantly for proper thickening and to activate the pectin.
- Remove Foam & Butter: Remove the pot from the heat and skim off any foam on the surface. If desired, stir in the unsalted butter now to help reduce further foaming during canning.
- Jar the Jam: Ladle the hot jam into sterilized half-pint jars, leaving a 1/4 inch headspace at the top. Wipe the rims clean before applying lids and rings to ensure a proper seal.
- Process in Water Bath: Process the sealed jars in a boiling water bath for 10 minutes (adjust time for altitude if necessary) to safely preserve the jam.
- Cool & Store: Remove the jars and let them cool completely before storing in a cool, dark place. The jam will thicken further as it cools.
Notes
- For a smoother texture, mash or briefly blend the apples before adding the pectin.
- This jam is ideal on toast, pancakes, or as a sweet filling for pastries and cakes.
- Be sure to use sterilized jars and process them properly to ensure shelf-stability.
