
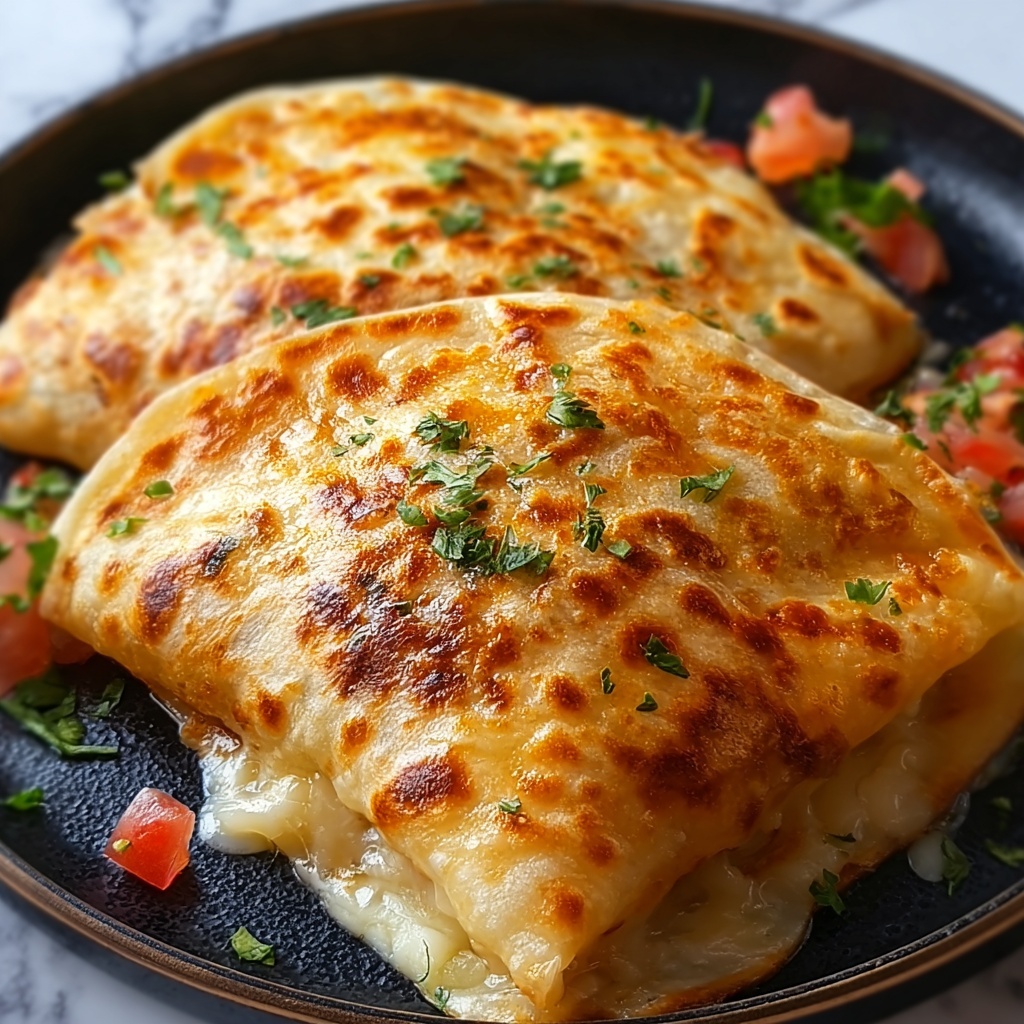
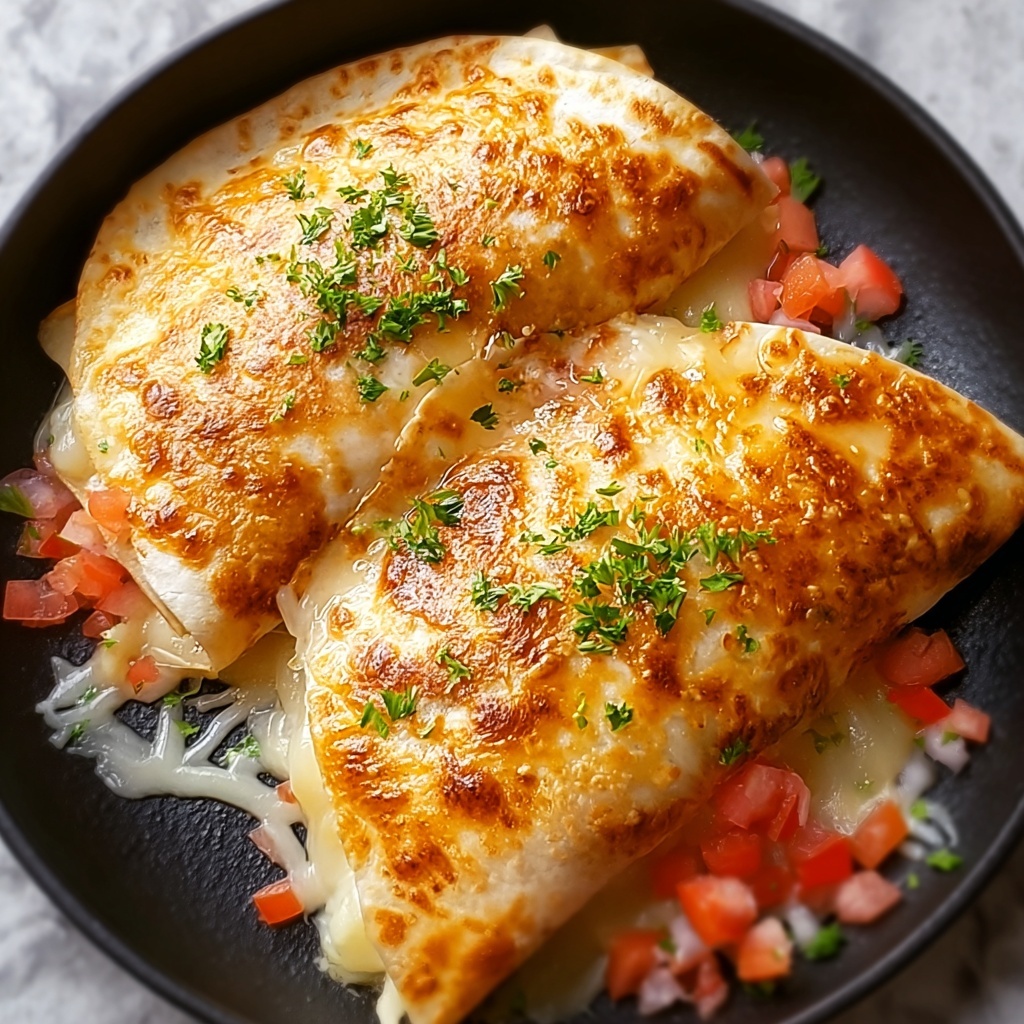
If you’ve been craving a crunchy, flavorful, and wholly satisfying Tex-Mex dish, then you are absolutely going to love this Baked Chicken Chimichangas Recipe. Imagine tender shredded chicken tossed with zesty spices and gooey cheese, all wrapped up in a warm flour tortilla and baked to golden perfection for that irresistible crispiness. This recipe transforms a classic favorite into a healthier version without losing any of the zest and crunch you adore. It’s simple enough for a weeknight meal yet special enough to impress guests, making it a must-try in your kitchen rotation.
Ingredients You’ll Need
Gathering the right ingredients is the foundation of any great dish, and this Baked Chicken Chimichangas Recipe is no exception. Each component plays a vital role in creating the perfect balance of flavors, textures, and colors, from the tangy salsa and spicy seasonings to the melty cheeses and crisp tortillas.
- 2 cups cooked, shredded chicken: The hearty base that soaks up all the spices and cheese beautifully.
- 1 cup salsa: Adds brightness and a touch of moisture to keep the filling juicy.
- 1 teaspoon ground cumin: Brings a warm, earthy depth typical of Tex-Mex cuisine.
- 1 teaspoon chili powder: Provides a gentle kick that’s perfectly balanced with the other spices.
- 1 cup shredded cheddar cheese: Sharp and melty, it adds flavor and ooey-gooey appeal.
- 1 cup shredded Monterey Jack cheese: Creamy and mild, it melts smoothly alongside the cheddar.
- 6 large flour tortillas: The sturdy wrapping that crisps up beautifully in the oven.
- 2 tablespoons olive oil: Brushed on top to achieve that gorgeous golden crust.
- Sour cream, for serving (optional): Perfect for a cooling contrast to the spices.
- Guacamole, for serving (optional): Adds creamy richness and fresh flavor.
- Fresh cilantro, for garnish: A bright herbaceous touch that livens up every bite.
How to Make Baked Chicken Chimichangas Recipe
Step 1: Preheat and Prepare
Start by preheating your oven to 400°F (200°C). This temperature is key to getting that perfect crunch on the outside while keeping the filling warm and melty inside. Prepare a baking sheet by lining it with parchment paper; this helps prevent sticking and makes cleanup a breeze.
Step 2: Mix the Filling
In a large bowl, combine the shredded chicken, salsa, ground cumin, chili powder, cheddar cheese, and Monterey Jack cheese. This mixture is the flavorful heart of your chimichangas. The spices will infuse the chicken with that classic zing, while the cheeses melt and bind the filling together, ensuring each bite is deliciously gooey.
Step 3: Assemble the Chimichangas
Lay out each flour tortilla and spoon roughly 1/3 cup of the chicken mixture onto the center. Fold the two sides over the filling, then roll it up tightly from one end to the other. This technique keeps the filling securely wrapped inside so it bakes nicely without spilling out.
Step 4: Brush and Bake
Place your rolled chimichangas seam-side down on the prepared baking sheet to keep them from unraveling. Brush the tops with olive oil; this little touch is what transforms them from soft tortillas into crispy golden delights. Bake in the preheated oven for 20-25 minutes until they are crunchy and browned.
Step 5: Serve and Enjoy
Once baked, your chimichangas are ready to be enjoyed! Serve them hot with dollops of tangy sour cream, creamy guacamole, and a sprinkle of fresh cilantro to elevate the dish with color and fresh flavor.
How to Serve Baked Chicken Chimichangas Recipe
Garnishes
Adding garnishes not only enhances the visual appeal but also layers in cool, fresh contrasts to the baked chimichangas. A spoonful of sour cream introduces a tangy creaminess that balances the spice, while guacamole offers buttery richness and smooth texture. Sprinkling fresh cilantro brings a burst of herbal brightness that keeps each bite lively and refreshing.
Side Dishes
Pairing the Baked Chicken Chimichangas Recipe with the right sides will complete your meal perfectly. Consider a crisp Mexican-style slaw for crunch and acidity, or a simple black bean salad to add protein and color. Rice seasoned with lime and cilantro is another classic companion that brings subtle zest and fluffiness to round out the plate.
Creative Ways to Present
Want to impress your dinner guests or just spice up your usual routine? Slice the chimichangas into bite-sized portions and arrange them on a platter with small bowls of different salsas and dips. You can also top each chimichanga with shredded lettuce, diced tomatoes, and a drizzle of hot sauce for a colorful taco-style presentation that’s fun and interactive.
Make Ahead and Storage
Storing Leftovers
You can keep leftover baked chicken chimichangas fresh by storing them in an airtight container in the refrigerator for up to 3 days. Keeping them sealed well preserves the moisture in the filling and prevents the tortillas from becoming soggy.
Freezing
These chimichangas freeze beautifully! Wrap each one tightly in plastic wrap or foil, then place in a freezer-safe bag or container. They will keep for up to 2 months, making them a perfect prep-ahead meal for busy days when you want something quick, satisfying, and homemade.
Reheating
To reheat and restore their signature crispness, bake thawed chimichangas in a 375°F (190°C) oven for about 10-15 minutes until heated through and crisped up again. Avoid microwaving if possible, as it tends to make the tortillas soft instead of wonderfully crunchy.
FAQs
Can I use rotisserie chicken for this recipe?
Absolutely! Using cooked rotisserie chicken is a convenient way to get tender, flavorful chicken without additional prep, making it perfect for the Baked Chicken Chimichangas Recipe.
What if I can’t find Monterey Jack cheese?
You can easily substitute Monterey Jack with mozzarella or even a mild white cheddar. The key is to have a cheese that melts well and adds creaminess to the filling.
Is it possible to make these spicy?
Definitely! You can add chopped jalapeños to the filling or sprinkle some cayenne pepper for extra heat. Adjust the chili powder to your liking as well to get that perfect spicy kick.
Can these be made gluten-free?
Yes, by using gluten-free tortillas, you can enjoy this Baked Chicken Chimichangas Recipe without worry. Just be sure to check that other ingredients like salsa and seasoning blends don’t contain gluten.
How do I prevent chimichangas from getting soggy?
Always bake seam-side down to seal the filling inside, and brush the tortillas with olive oil before baking to encourage crispiness. Serving immediately after baking also helps maintain their delightful crunch.
Final Thoughts
I truly believe this Baked Chicken Chimichangas Recipe is one of those wonderful dishes that brings comfort, excitement, and ease all on one plate. It’s bursting with flavor, offers a satisfying crunch, and holds a special place in any weeknight meal plan or casual gathering. Don’t hesitate to make these your own by tweaking the spices or adding your favorite toppings. Once you try this recipe, it might just become your new go-to for an irresistibly delicious chicken dinner!
Print
Baked Chicken Chimichangas Recipe
- Prep Time: 10 minutes
- Cook Time: 25 minutes
- Total Time: 35 minutes
- Yield: 6 servings
- Category: Main Course
- Method: Baking
- Cuisine: Mexican
Description
These Baked Chicken Chimichangas are a delicious and healthier twist on the classic deep-fried Mexican favorite. Stuffed with a flavorful mix of shredded chicken, salsa, spices, and melted cheese, then baked to golden perfection, they offer a crispy texture without the extra oil. Perfect for a satisfying weeknight dinner or entertaining guests, served with optional sour cream, guacamole, and fresh cilantro.
Ingredients
Filling
- 2 cups cooked, shredded chicken
- 1 cup salsa
- 1 teaspoon ground cumin
- 1 teaspoon chili powder
- 1 cup shredded cheddar cheese
- 1 cup shredded Monterey Jack cheese
Wrap and Topping
- 6 large flour tortillas
- 2 tablespoons olive oil
Optional Garnishes
- Sour cream, for serving
- Guacamole, for serving
- Fresh cilantro, for garnish
Instructions
- Preheat the oven: Preheat your oven to 400°F (200°C) and line a baking sheet with parchment paper to prevent sticking and ensure easy cleanup.
- Prepare the filling: In a large bowl, combine the cooked, shredded chicken with salsa, ground cumin, chili powder, shredded cheddar cheese, and shredded Monterey Jack cheese. Mix thoroughly to evenly distribute all ingredients.
- Assemble chimichangas: Spoon approximately 1/3 cup of the chicken mixture onto the center of each flour tortilla. Fold the sides over the filling, then roll the tortilla tightly to encase the filling completely.
- Prepare for baking: Place each chimichanga seam-side down on the prepared baking sheet to prevent them from unrolling during baking. Lightly brush the tops and sides with olive oil to help them crisp up in the oven.
- Bake: Bake the chimichangas in the preheated oven for 20-25 minutes, or until they turn golden brown and crispy on the outside.
- Serve: Remove from the oven and serve hot. Optionally, garnish with sour cream, guacamole, and fresh cilantro for extra flavor and presentation.
Notes
- For extra crispy chimichangas, you can broil them for an additional 1-2 minutes, watching closely to avoid burning.
- Feel free to substitute cooked shredded chicken with pre-cooked rotisserie chicken for convenience.
- Flour tortillas work best for rolling and baking, but you can use whole wheat tortillas for a healthier option.
- Store leftovers in an airtight container in the refrigerator for up to 3 days and reheat in the oven to maintain crispiness.
