“`html
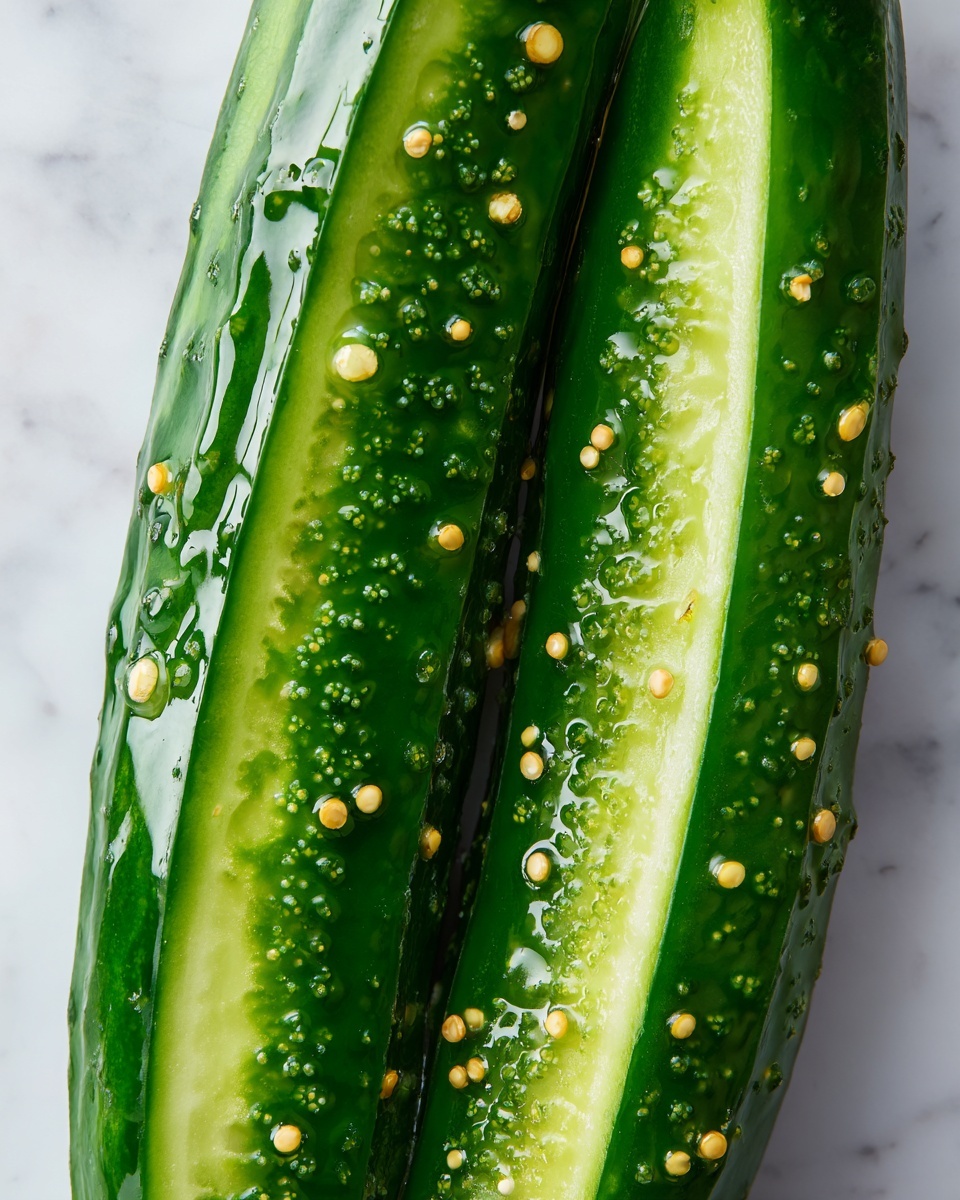
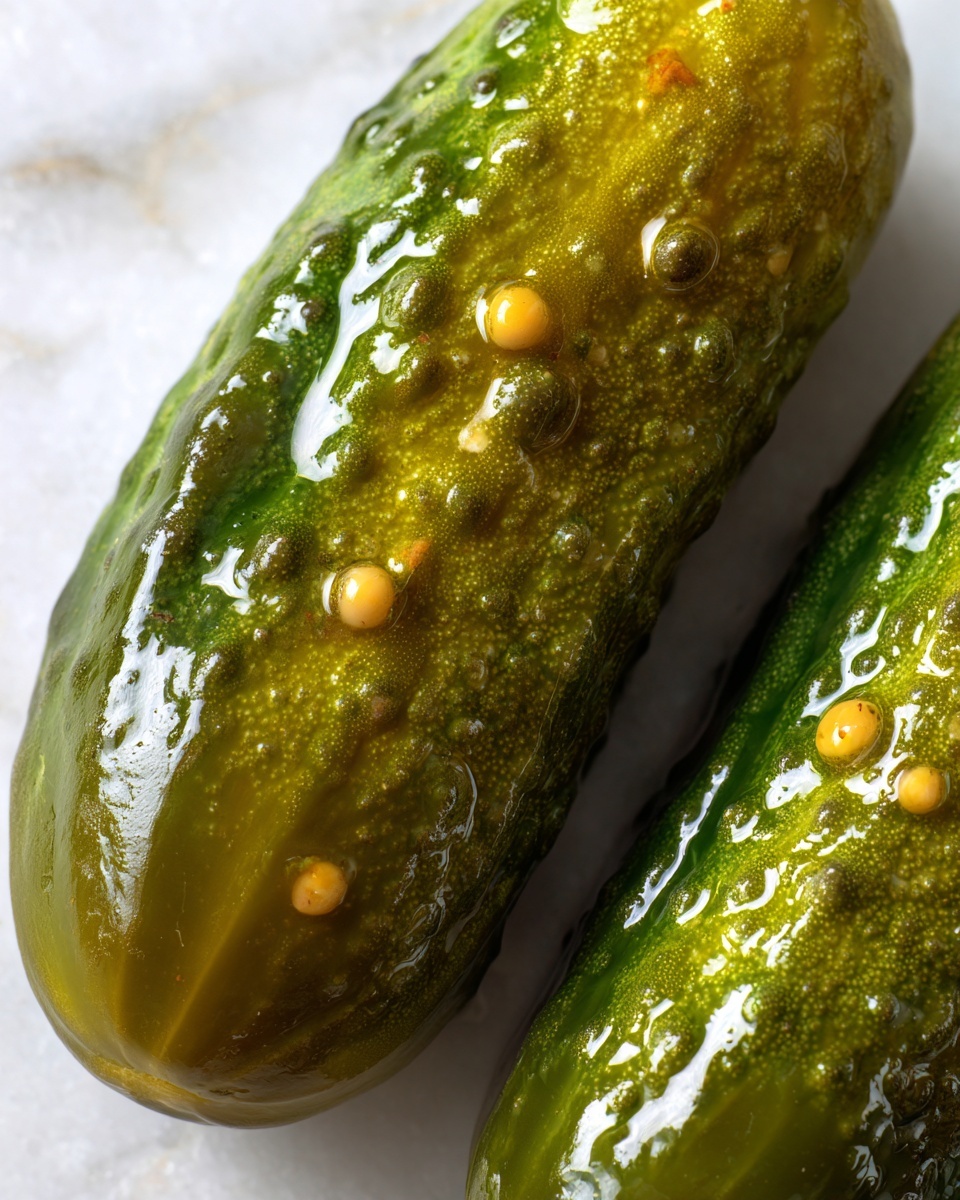
If you have ever wondered how to capture the essence of tangy, crunchy pickles just like Grandma used to make, this Traditional Kosher Dill Pickles Recipe is your golden ticket. Packed with fresh dill, garlic, and carefully balanced spices, these pickles bring that perfect burst of flavor that complements every bite with a satisfying crunch. Whether you’re new to pickling or a longtime enthusiast, this recipe celebrates authenticity and simplicity, delivering classic pickle goodness straight from your kitchen.
Ingredients You’ll Need
Gathering fresh, simple ingredients is the key to mastering this Traditional Kosher Dill Pickles Recipe. Each component plays a vital role—from the crisp cucumbers to the aromatic dill—ensuring every bite is alive with flavor and texture.
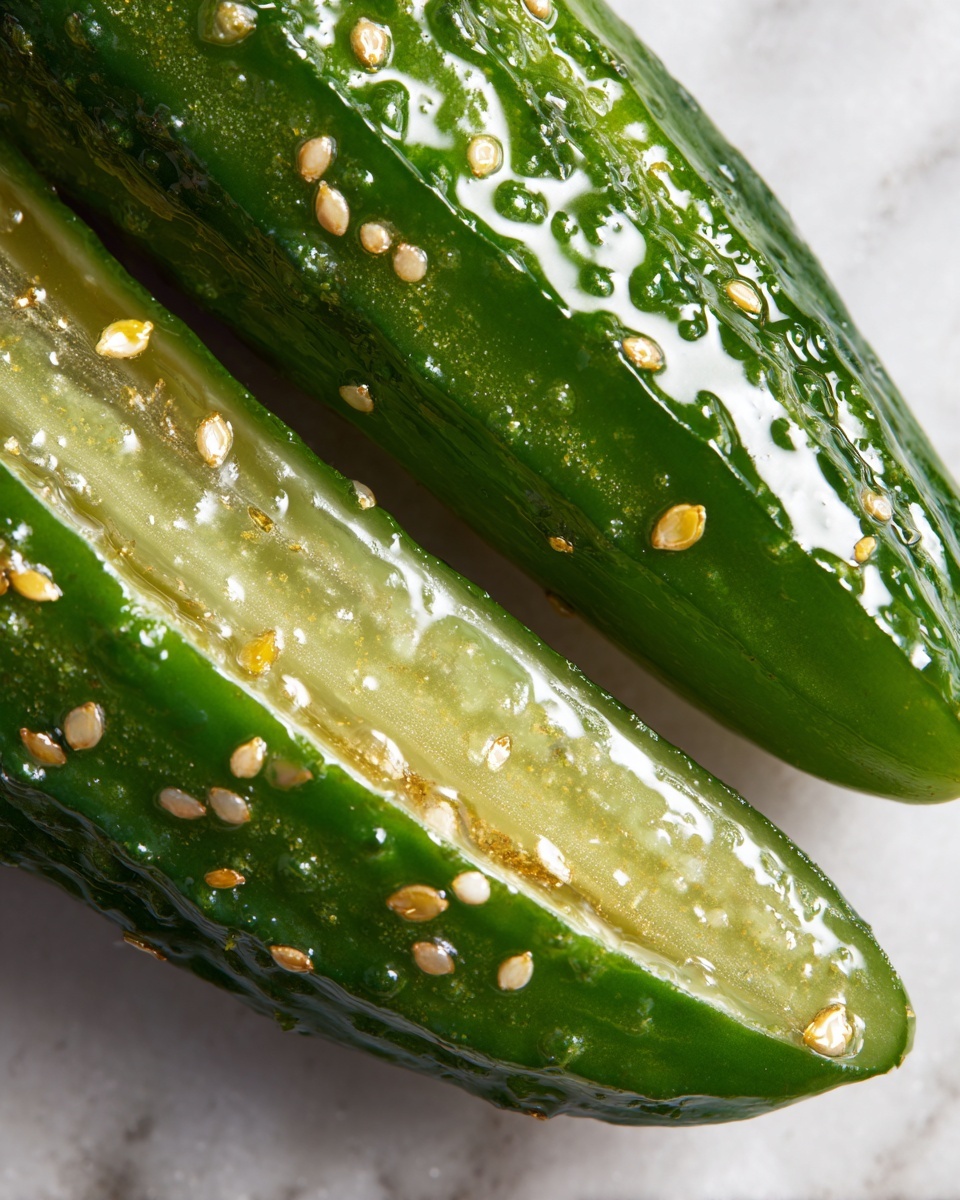
- Small cucumbers (Kirby or pickling cucumbers): Crisp and firm, these cucumbers have the perfect texture for pickling without becoming mushy.
- Garlic cloves, smashed: Adds a pungent, savory warmth that enriches the brine.
- Fresh dill heads or sprigs: The unmistakable herbaceous aroma that gives these pickles their classic dill flavor.
- Whole black peppercorns: Provides subtle spice and depth.
- Mustard seeds (optional): A mild tangy note that enhances the complexity of the brine.
- Red pepper flakes (optional): For a gentle kick of heat that livens up the flavor.
- Kosher salt (non-iodized): Essential for creating the perfect brine that promotes fermentation and flavor.
- Filtered or dechlorinated water: Pure water is a must to encourage natural fermentation without additives.
- Grape leaf or bay leaf (optional): These help keep the pickles crisp by preventing softening during fermentation.
- Wide-mouth jar (1 quart or larger): The perfect vessel to house your pickling magic and allow room for fermentation.
How to Make Traditional Kosher Dill Pickles Recipe
Step 1: Prepare the Brine
Start by dissolving kosher salt completely in filtered water, creating the essential brine that forms the pickle’s salty, tangy backbone. This easy step sets the stage for natural fermentation, lending that classic sour flavor we all adore.
Step 2: Prepare the Cucumbers
Wash your cucumbers thoroughly to remove any dirt and gently trim just the blossom end. This small but important step prevents your pickles from turning soft, ensuring they stay firm and crunchy throughout the process.
Step 3: Pack the Jar
Layer the smashed garlic, fresh dill, whole peppercorns, and any optional mustard seeds or red pepper flakes into the bottom of your wide-mouth jar. These aromatics anchor the flavor and infuse the cucumbers from the very start, making every bite sing.
Step 4: Add Cucumbers
Pack your cucumbers tightly into the jar, arranging them vertically if possible or any way they fit best. The snug fit is important for even fermentation and prevents air pockets that might affect the texture.
Step 5: Add Brine
Pour the prepared brine over the cucumbers until they’re completely submerged. This step is crucial for the natural fermentation process—no cucumber should peek above the brine or it risks spoilage.
Step 6: Weigh Down
Use a fermentation weight or a smaller jar to keep the cucumbers submerged under the brine. This keeps them in an anaerobic environment, which is vital for proper fermentation and that signature pickle tang.
Step 7: Cover
Cover the jar loosely with a lid or a cloth secured with a rubber band, allowing gases from fermentation to escape while keeping dust and insects out. This helps develop rich, bubbly flavors while keeping your pickles safe.
Step 8: Ferment
Leave the jar at room temperature between 65 and 75 degrees Fahrenheit for 4 to 7 days. Taste your pickles starting around day 3 or 4 until they reach your ideal tangy crunch. Once perfect, transfer the jar to the refrigerator to slow down fermentation and preserve freshness.
How to Serve Traditional Kosher Dill Pickles Recipe
Garnishes
Enhance your pickles by serving them with a sprinkle of fresh dill or roasted garlic slices. These simple garnishes complement the flavors already present and add visual appeal when serving guests.
Side Dishes
Traditional Kosher Dill Pickles make a perfect crunchy side alongside deli sandwiches, creamy potato salads, or charcuterie boards. Their bright acidity cuts through rich foods beautifully, balancing out heavy dishes with crisp vibrancy.
Creative Ways to Present
For a fun twist, try chopping the pickles to add to homemade potato salad or finely dice them as a topping for burgers and fish tacos. You can also skewer whole pickles with cheese and cold cuts for delightful party snacks everyone will love.
Make Ahead and Storage
Storing Leftovers
Once fermented and refrigerated, your Traditional Kosher Dill Pickles Recipe will keep well for several weeks. Ensure they remain submerged in brine and tightly sealed to maintain crispness and flavor.
Freezing
Freezing is not recommended for these pickles, as thawing will cause them to lose their prized crunch and become mushy, detracting from that perfect bite you worked hard to create.
Reheating
These pickles are best enjoyed cold or at room temperature. Reheating is unnecessary because their charm lies in their refreshing crunch and tangy bite.
FAQs
Can I use regular table salt instead of kosher salt?
It’s better to use kosher salt for this recipe because table salt often contains additives that can cloud the brine or interfere with fermentation. Kosher salt dissolves cleanly and promotes crisp, bright pickles.
How long can I ferment the pickles?
The typical fermentation time is 4 to 7 days, depending on temperature and taste preferences. Warmer rooms speed up fermentation, so start tasting at day 3 to avoid over-fermentation.
Can I add sugar to the brine?
Traditional Kosher Dill Pickles are known for their tart and savory notes without sweetness. Adding sugar changes the profile and is not recommended if you want to keep the authentic flavor.
What causes pickles to get soft?
Soft pickles can result from using the wrong cucumbers, poor salt concentration, or cutting the blossom end improperly. Using pickling cucumbers and trimming the blossom end helps maintain crunch.
Is this recipe safe for beginners?
Absolutely. This Traditional Kosher Dill Pickles Recipe is straightforward and forgiving, perfect for first-timers eager to dive into the world of fermentation without fuss or fancy equipment.
Final Thoughts
Nothing beats making your own Traditional Kosher Dill Pickles Recipe at home—a simple, rewarding process that fills your kitchen with incredible aromas and leaves you with crisp, delightful pickles to savor. I can’t wait for you to try this timeless favorite and add a bit of zesty crunch to your meals. Happy pickling!
“`
Print
Traditional Kosher Dill Pickles Recipe
- Prep Time: 15 minutes
- Cook Time: 0 minutes
- Total Time: 4 to 7 days fermentation time
- Yield: Approximately 1 quart of pickles
- Category: Pickling
- Method: No-Cook
- Cuisine: Jewish
- Diet: Kosher
Description
Traditional Kosher Dill Pickles are a classic fermented cucumber recipe, featuring a crunchy texture and tangy, garlicky flavor. Using simple ingredients like fresh cucumbers, garlic, dill, and kosher salt, this naturally fermented pickle recipe transforms ordinary cucumbers into deliciously zesty pickles that can be enjoyed on their own or as a vibrant addition to sandwiches and salads.
Ingredients
Pickling Ingredients
- Small cucumbers (Kirby or pickling cucumbers) – quantity as needed
- Garlic cloves, smashed – 3 to 4 cloves
- Fresh dill heads or sprigs – 2 to 3 sprigs
- Whole black peppercorns – 1 teaspoon
- Mustard seeds (optional) – 1 teaspoon
- Red pepper flakes (optional) – 1/2 teaspoon
- Kosher salt (non-iodized) – about 3 tablespoons
- Filtered or dechlorinated water – 4 cups (or enough to fill jar)
- Grape leaf or bay leaf (optional, for crunch) – 1 leaf
- Wide-mouth jar (1 quart or larger)
Instructions
- Prepare the Brine: In a suitable container, dissolve 3 tablespoons of kosher salt into 4 cups of filtered or dechlorinated water by stirring thoroughly until completely dissolved. Set the brine aside.
- Prepare the Cucumbers: Thoroughly wash the cucumbers to remove any dirt or debris. Trim only the blossom end of each cucumber to prevent them from softening during fermentation while keeping the stem end intact.
- Pack the Jar: Add smashed garlic cloves, fresh dill heads or sprigs, whole black peppercorns, and any optional spices such as mustard seeds or red pepper flakes into the bottom of your wide-mouth jar. If using, add the grape or bay leaf as well to help maintain crunchiness.
- Add Cucumbers: Carefully pack the cleaned cucumbers tightly into the jar, arranging them vertically or as space allows to maximize the number of cucumbers in the jar.
- Add Brine: Pour the prepared kosher salt brine over the cucumbers, ensuring they are fully submerged. The brine should cover the cucumbers completely to promote safe fermentation.
- Weigh Down: Place a fermentation weight or a smaller jar inside the larger jar to keep the cucumbers submerged under the brine. This prevents exposure to air which can lead to spoilage.
- Cover: Loosely cover the jar with a lid, or use a cloth secured with a rubber band to allow gases produced during fermentation to escape while keeping contaminants out.
- Ferment: Leave the jar at room temperature, ideally between 65°F and 75°F (18°C to 24°C), for 4 to 7 days. Begin tasting the pickles after 3 to 4 days to check for desired tanginess. When fermented to your preference, transfer the jar to the refrigerator to slow down the fermentation process and preserve the pickles.
Notes
- Use non-iodized kosher salt to avoid cloudiness and off-flavors in the brine.
- Trim only the blossom end of cucumbers to maintain firmness while preventing enzymatic softening.
- Keep cucumbers fully submerged during fermentation to avoid mold growth.
- Fermentation time can vary depending on room temperature and personal taste preference.
- If the brine becomes cloudy, it is normal; however, if you detect an off or rotten smell, discard the batch.
- Using grape or bay leaves helps retain the crisp texture of pickles.
- Store fermented pickles refrigerated after fermentation to prolong shelf life.

