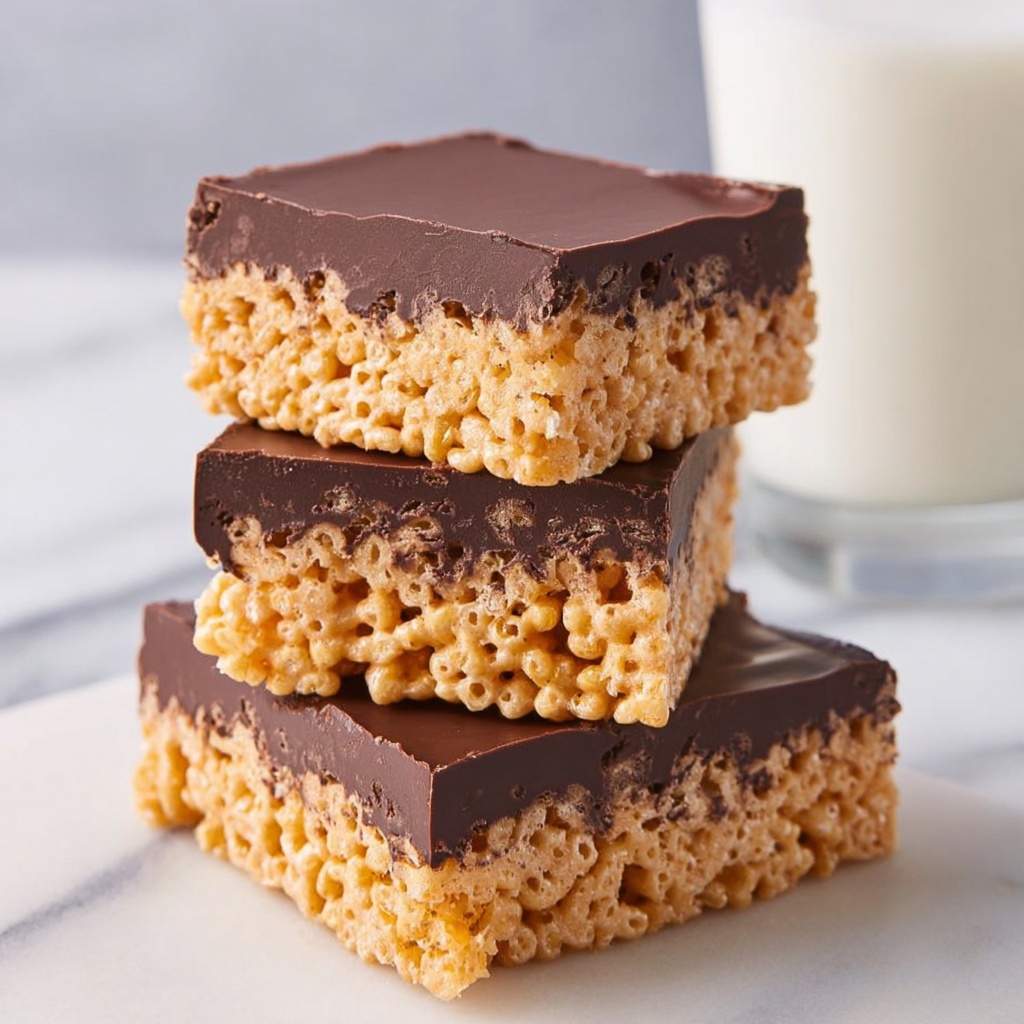
If you have a sweet tooth and love that perfect combo of gooey, crunchy, and chocolatey, then you’re going to fall head over heels for this Peanut Butter Rice Krispie Treats Recipe. Imagine soft marshmallows and rich peanut butter melting into crispy Rice Krispies, all topped with a smooth layer of luscious chocolate. These treats are easy to make, wonderfully nostalgic, and guaranteed to bring smiles at any gathering or cozy night in. Honestly, once you try this Peanut Butter Rice Krispie Treats Recipe, it might just become your new favorite go-to dessert!
Ingredients You’ll Need
One of the best things about this Peanut Butter Rice Krispie Treats Recipe? The ingredients are straightforward but packed with flavor and texture, making it simple to whip up a batch in no time. Each component plays a special role in creating the perfect balance of creamy, crunchy, and sweet.
- 1/4 cup unsalted butter: Adds richness and helps melt the marshmallows smoothly.
- 1 (10 oz) bag mini marshmallows (about 5 cups): The key to that classic sticky, melt-in-your-mouth base.
- 1/2 cup peanut butter: Brings that irresistible nutty flavor and creamy texture.
- 6 cups Rice Krispie cereal: Provides the signature crisp crunch that makes these treats fun to eat.
- 8 oz chocolate chips (about 1 1/3 cups): Creates a decadent, glossy chocolate topping.
- 2 teaspoons vegetable oil: Gives the melted chocolate a smooth, shiny finish so it hardens beautifully.
How to Make Peanut Butter Rice Krispie Treats Recipe
Step 1: Prepare Your Pan
Start by lightly greasing a 9×13 inch pan with butter or non-stick cooking spray. This simple step will make sure your treats come out clean and in perfect squares. Trust me, it’s worth the extra minute of prep!
Step 2: Melt Butter, Marshmallows, and Peanut Butter
In a large saucepan over low heat, melt together the butter, mini marshmallows, and peanut butter. Stir gently and patiently until everything melds into a smooth, sticky dream. This mixture is where all the magic begins: the luscious peanut butter flavor combining with the classic marshmallow goo.
Step 3: Fold in the Rice Krispies
Remove the melted mixture from heat, then stir in the crunchy Rice Krispie cereal. This step is crucial to evenly coat every crispy piece, ensuring each bite is packed with that beloved chewy-crunchy contrast.
Step 4: Press into the Pan
Now comes the fun part—press the sticky cereal mixture firmly into your prepared pan. To avoid any sticky finger disasters, lightly spray your hands with cooking spray before pressing. You’ll want the surface to be smooth and even so the chocolate topping sets beautifully later on.
Step 5: Melt the Chocolate Topping
Add the chocolate chips to a medium heatproof bowl. Microwave at 45-second intervals on medium power, stirring in between, until the chocolate is almost melted. Then stir until the chocolate is perfectly smooth. Mixing in the vegetable oil adds a silky shine and helps your chocolate harden with a lovely snap.
Step 6: Pour Chocolate Over Treats and Let Set
Pour the melted chocolate evenly over the pressed Rice Krispie base. Allow it to harden at room temperature for about 2 hours. This patient step will reward you with a firm, glossy chocolate layer that adds a decadent finish to your treat bars.
Step 7: Cut and Enjoy
Once fully set, slice your Peanut Butter Rice Krispie Treats into squares and get ready to savor every bite. These treats store wonderfully in an airtight container at room temperature, meaning you can enjoy them over days or share with friends without worry.
How to Serve Peanut Butter Rice Krispie Treats Recipe
Garnishes
While these treats are fantastic on their own, you can always jazz them up with some fun garnishes. Sprinkle a pinch of flaky sea salt on top before the chocolate hardens to enhance the peanut butter flavor and add a delightful salty kick. Or, for a festive touch, add colorful sprinkles or chopped peanuts for texture and personality.
Side Dishes
Peanut Butter Rice Krispie Treats pair beautifully with a cold glass of milk or a cup of hot coffee or tea. For parties, consider serving alongside fresh fruit like sliced strawberries or banana for a refreshing contrast to the sweetness. This combo keeps the dessert table balanced and inviting.
Creative Ways to Present
Want to impress your guests? Cut the treats into fun shapes using cookie cutters, then arrange them on a beautiful platter with some nuts or berries for a colorful spread. You can also layer the treats in a clear jar with whipped cream and chocolate drizzle for a no-bake parfait-style dessert that’s as charming as it is delicious.
Make Ahead and Storage
Storing Leftovers
Leftover Peanut Butter Rice Krispie Treats can be stored in an airtight container at room temperature for up to a week. This keeps them chewy and fresh without the chocolate topping losing its snap. Just be sure to keep them away from direct sunlight or heat.
Freezing
If you want to make these treats well in advance, they freeze wonderfully. Wrap individual bars tightly in plastic wrap and store in a freezer-safe bag or container for up to 2 months. When ready to enjoy, thaw at room temperature for a couple of hours for a soft, tasty treat.
Reheating
While these treats are best enjoyed at room temperature, if you like them a bit warm and gooier, pop a single piece in the microwave for about 10-15 seconds. Be careful not to overheat or they can get a bit too sticky. Warmed up, the peanut butter and chocolate flavors become even more indulgent.
FAQs
Can I use chunky peanut butter instead of smooth?
Absolutely! Chunky peanut butter will add extra texture and a delightful crunch to your Peanut Butter Rice Krispie Treats Recipe. Just keep in mind it may alter the chewiness slightly but definitely makes for a fun twist.
What if I don’t have Rice Krispies cereal?
You can substitute similar puffed rice cereals, but Rice Krispies are ideal because of their signature light crunch. Avoid dense cereals, as they won’t provide the same airy texture that makes these treats so delightful.
Can I make this recipe without chocolate on top?
Yes, the chocolate layer is optional but highly recommended! If you prefer, simply skip the topping for a classic peanut butter marshmallow treat or drizzle melted peanut butter on top for extra flavor.
Is this recipe safe for kids to help make?
Definitely! Kids will love stirring the marshmallow mixture and pressing it into the pan. Just make sure an adult handles the heating steps, especially melting the chocolate and marshmallows on the stove and in the microwave.
How do I keep the treats from sticking to my hands?
Lightly spray your hands with non-stick cooking spray or rub them with a bit of butter before pressing the mixture into the pan. This simple trick keeps sticky fingers at bay and makes shaping the treats much easier.
Final Thoughts
There’s something incredibly joyful and comforting about making and sharing Peanut Butter Rice Krispie Treats Recipe. Whether for a special occasion, a snack, or a nostalgic treat, these bars offer a perfect mix of flavors and textures that everyone will adore. Give this recipe a whirl, and get ready to enjoy a homemade dessert that feels like a warm hug in every bite!
Print
Peanut Butter Rice Krispie Treats Recipe
- Prep Time: 10 minutes
- Cook Time: 10 minutes
- Total Time: 2 hours 20 minutes
- Yield: 18 servings
- Category: Dessert, Snack
- Method: Stovetop
- Cuisine: American
- Diet: Vegetarian
Description
These Peanut Butter Rice Krispie Treats combine the classic gooey marshmallow base with creamy peanut butter and a rich chocolate topping for an irresistible, crunchy, and chocolaty dessert that’s perfect for any occasion.
Ingredients
Base
- 1/4 cup unsalted butter
- 1 (10 oz) bag mini marshmallows (about 5 cups)
- 1/2 cup peanut butter
- 6 cups Rice Krispie cereal
Chocolate Topping
- 8 oz chocolate chips (about 1 1/3 cups)
- 2 teaspoons vegetable oil
Instructions
- Prepare the pan: Lightly grease a 9×13 inch pan using butter or non-stick cooking spray to prevent sticking.
- Melt the base ingredients: In a large saucepan over low heat, gently melt the butter, mini marshmallows, and peanut butter together, stirring continuously until smooth and combined.
- Mix in cereal: Remove the saucepan from heat and thoroughly stir in the Rice Krispie cereal to evenly coat each piece.
- Press into pan: Transfer the mixture into the prepared pan and firmly press it down. To prevent sticking, lightly spray your hands with non-stick cooking spray while pressing.
- Melt the chocolate: Place the chocolate chips in a medium heatproof bowl and microwave at medium power in 45-second intervals, stirring between each, until almost completely melted. Then stir until smooth.
- Add oil to chocolate: Stir the 2 teaspoons of vegetable oil into the melted chocolate to create a glossy and pourable consistency.
- Top the bars: Pour the chocolate evenly over the pressed Rice Krispie mixture and spread gently if needed.
- Set and cut: Allow the chocolate topping to harden at room temperature for about 2 hours. Once set, cut the treat into squares.
- Storage: Store the bars in an airtight container at room temperature for freshness.
Notes
- Spraying your hands with non-stick cooking spray helps prevent the sticky mixture from adhering while pressing.
- You can substitute chopped chocolate for the chocolate chips if preferred.
- For firmer bars, refrigerate after pouring the chocolate until toppings harden.
- Use smooth peanut butter for easier melting and smoother texture.
- Ensure low microwave power to avoid burning the chocolate during melting.


