
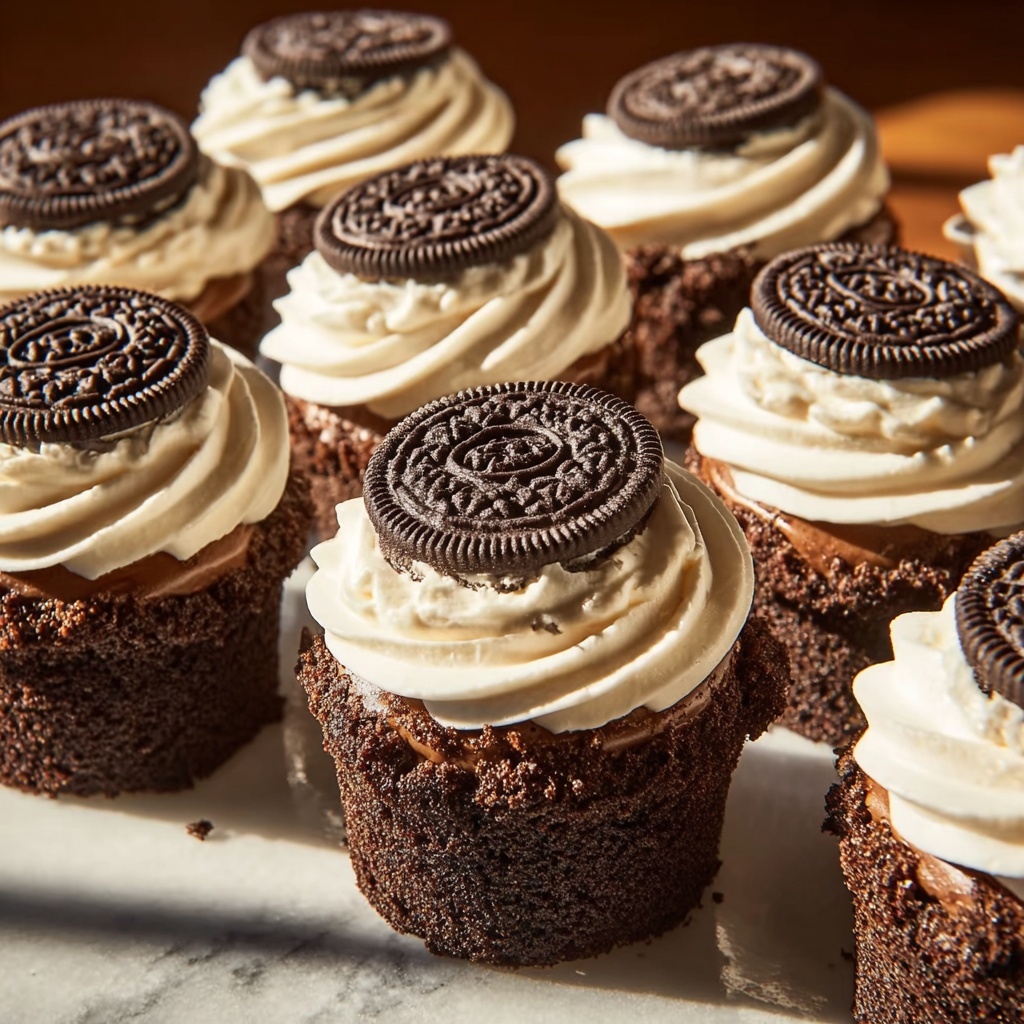
If you have a sweet tooth that loves a nostalgic twist, the Cookies and Cream Dessert Cups Recipe is an absolute game changer. This delightful treat combines the classic crunch and flavor of Oreos with a light, fluffy whipped cream mixture that melts in your mouth. Whether you’re looking for an easy dessert to impress guests or a special indulgence for yourself, these dessert cups come together with minimal effort and maximum satisfaction. Each spoonful delivers the perfect balance of creamy texture and crunchy cookie goodness, making it a crowd-pleaser every time.
Ingredients You’ll Need
The beauty of this Cookies and Cream Dessert Cups Recipe lies in its simplicity. With just a handful of easily found ingredients, you create layers of texture and taste that sing in harmony. Every component plays a key role, from the Oreo cookies providing the iconic crunch to the heavy cream lending luxurious smoothness.
- Oreo cookies: Twelve cookies crushed finely create that signature cookies and cream texture and flavor.
- Heavy cream: Two cups whipped add a rich, airy base that makes the dessert feel light and indulgent.
- Powdered sugar: A quarter cup brings just the right amount of sweetness without overpowering the other ingredients.
- Vanilla extract: One teaspoon adds a warm, inviting aroma and depth to the whipped cream.
How to Make Cookies and Cream Dessert Cups Recipe
Step 1: Crush the Oreo Cookies
Start by placing the Oreo cookies in a plastic bag and gently crushing them with a rolling pin. Aim for fine crumbs with some small chunks to add texture so that when they mix into the cream, they give you that satisfying crunch in every bite.
Step 2: Whip the Heavy Cream
In a large bowl, whip the heavy cream until you see soft peaks form. This means the cream holds its shape softly when you lift the whisk, giving the dessert its signature light and fluffy structure.
Step 3: Add Sugar and Vanilla
Now add the powdered sugar and vanilla extract to the whipped cream, then continue whisking until you reach stiff peaks. At this stage, the cream should be firm enough to hold its shape firmly without collapsing.
Step 4: Fold in the Crushed Oreos
Gently fold the crushed cookies into the whipped cream. This careful folding helps maintain the airy texture while evenly incorporating those delicious cookie bits throughout the mixture.
Step 5: Spoon into Serving Cups
Spoon the creamy cookie mixture into individual dessert cups. This portioning not only looks charming but also makes it easy to serve and enjoy.
Step 6: Chill Before Serving
Place the cups in the refrigerator for at least one hour. This resting time allows the flavors to meld perfectly and the dessert to set just right, giving you that delightful creamy yet firm consistency.
How to Serve Cookies and Cream Dessert Cups Recipe
Garnishes
To elevate your Cookies and Cream Dessert Cups Recipe, garnish with a sprinkle of extra crushed Oreos on top or a few whole mini Oreos for a decorative touch. A drizzle of chocolate sauce or a sprig of fresh mint can add a pop of color and contrast that make your cups feel extra special.
Side Dishes
While these dessert cups shine on their own, pairing them with a light, fresh side like sliced strawberries or a tangy fruit salad complements the rich creaminess beautifully. A hot cup of coffee or a cold glass of milk also pairs wonderfully to round out the experience.
Creative Ways to Present
For an extra layer of fun, try serving the mixture layered in clear glasses to showcase the contrasting cream and cookie bits. You could even add a layer of chocolate pudding or peanut butter between layers for a creative twist on the classic Cookies and Cream Dessert Cups Recipe that will wow your guests.
Make Ahead and Storage
Storing Leftovers
If you have any leftovers, keep them covered tightly with plastic wrap or in airtight containers in the refrigerator. They will stay fresh and creamy for up to two days, though they rarely last that long!
Freezing
Freezing is not recommended for this Cookies and Cream Dessert Cups Recipe because the texture of whipped cream and crushed cookies can become grainy or lose their lightness upon thawing.
Reheating
This dessert is best enjoyed cold and should not be reheated. The gentle chill helps the flavors settle and the cream maintain its fluffy texture, making each bite a pure delight.
FAQs
Can I use other cookies instead of Oreos?
Absolutely! While Oreos are the classic choice for Cookies and Cream Dessert Cups Recipe, you can experiment with chocolate chip cookies, sandwich cookies, or any favorite cookie to create your own twist.
What can I substitute for heavy cream?
Heavy cream is essential for its ability to whip into a fluffy texture. Using alternatives like evaporated milk or coconut cream may change the consistency, but coconut cream is a good dairy-free substitute if whipped properly.
How long does the dessert need to chill?
At least one hour in the refrigerator is ideal for the Cookies and Cream Dessert Cups Recipe so the flavors meld and it firms up nicely. You can chill longer if needed, even overnight for more convenience.
Is this recipe suitable for kids?
Definitely! This dessert is kid-friendly in flavor and texture, plus it’s fun for little ones to help crush cookies or spoon the mixture into cups before chilling.
Can I make larger portions instead of individual cups?
You can absolutely make this recipe in a larger bowl or dish and serve it family-style with spoons. Individual cups just add a fancy touch and make it easier to portion out servings.
Final Thoughts
If you’re ready to treat yourself or impress your friends with minimal fuss but maximum flavor, the Cookies and Cream Dessert Cups Recipe is a must-try. It’s simple, satisfying, and downright addictive, proving once again that some of the best desserts come from combining classic flavors in a fresh, easy way. Go ahead, whip up a batch and watch everyone fall in love with this creamy, crunchy delight!
Print
Cookies and Cream Dessert Cups Recipe
- Prep Time: 15 minutes
- Cook Time: 0 minutes
- Total Time: 1 hour 15 minutes
- Yield: 4 servings
- Category: Dessert
- Method: No-Cook
- Cuisine: American
Description
Delight in these Cookies and Cream Dessert Cups, a no-bake treat combining whipped cream and crushed Oreo cookies for a creamy, crunchy indulgence. Perfect for a quick, easy dessert that delivers classic cookie flavor with a light, fluffy texture.
Ingredients
Cookies
- 12 Oreo cookies
Cream Mixture
- 2 cups heavy cream
- 1/4 cup powdered sugar
- 1 tsp vanilla extract
Instructions
- Crush Cookies: Place the Oreos in a plastic bag and use a rolling pin to crush them into fine crumbs, setting aside a few larger pieces for texture if desired.
- Whip Cream: Pour the heavy cream into a large bowl and whip it with an electric mixer until soft peaks form, which means it should hold its shape but still be slightly creamy.
- Add Sugar and Vanilla: Add the powdered sugar and vanilla extract to the whipped cream, then continue whipping until stiff peaks form, where the cream stands firmly and won’t collapse.
- Fold in Oreos: Gently fold the crushed Oreo cookies into the whipped cream mixture using a spatula to evenly distribute them without deflating the cream.
- Assemble Cups: Spoon the cookies and cream mixture into individual serving cups, filling them generously.
- Chill: Refrigerate the dessert cups for at least 1 hour to allow the mixture to firm up and the flavors to meld for the best texture and taste.
Notes
- You can reserve some larger Oreo chunks to sprinkle on top for decoration and added crunch.
- For a lighter version, substitute heavy cream with whipped topping, though texture and flavor will vary.
- This dessert is best served within 24 hours of preparation for optimal freshness.
- Use gluten-free sandwich cookies to make this dessert gluten-free.
- For easier mixing, chill your bowl and beaters before whipping the cream.


