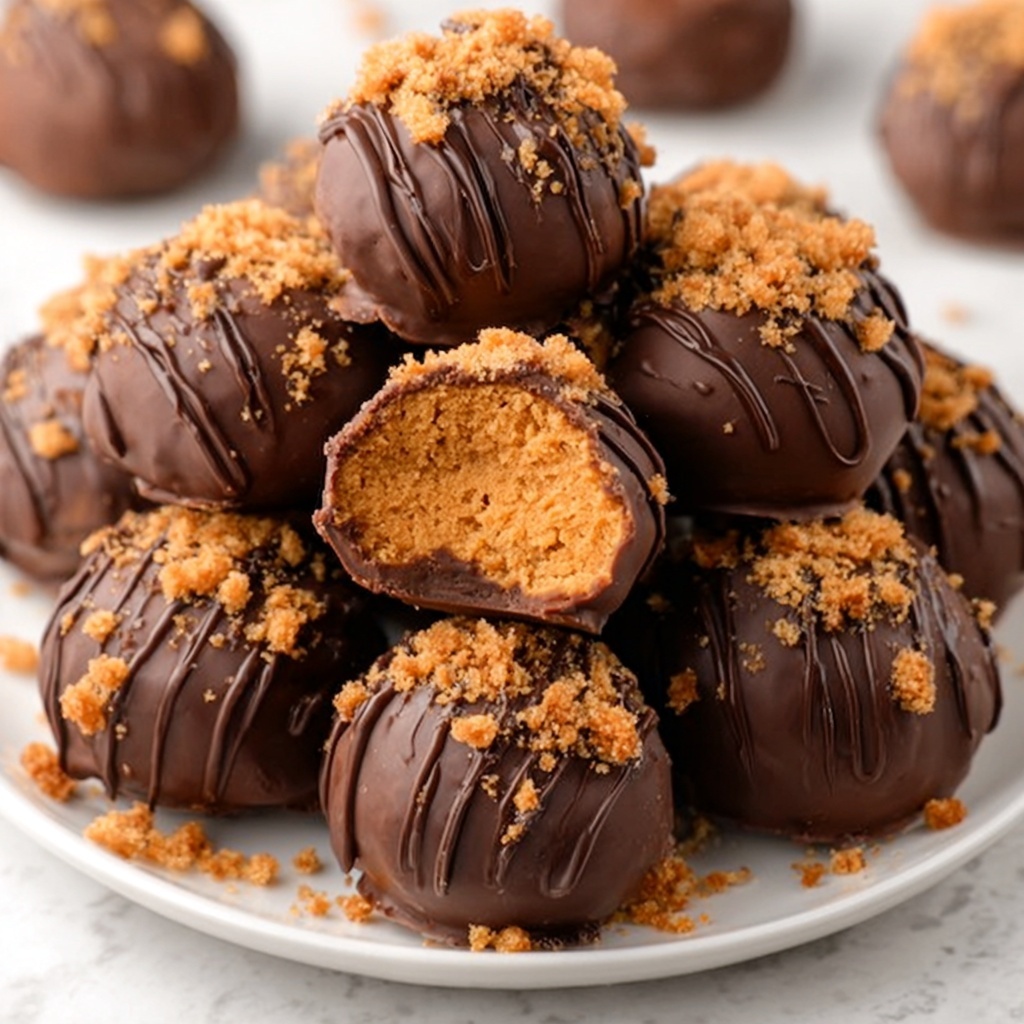
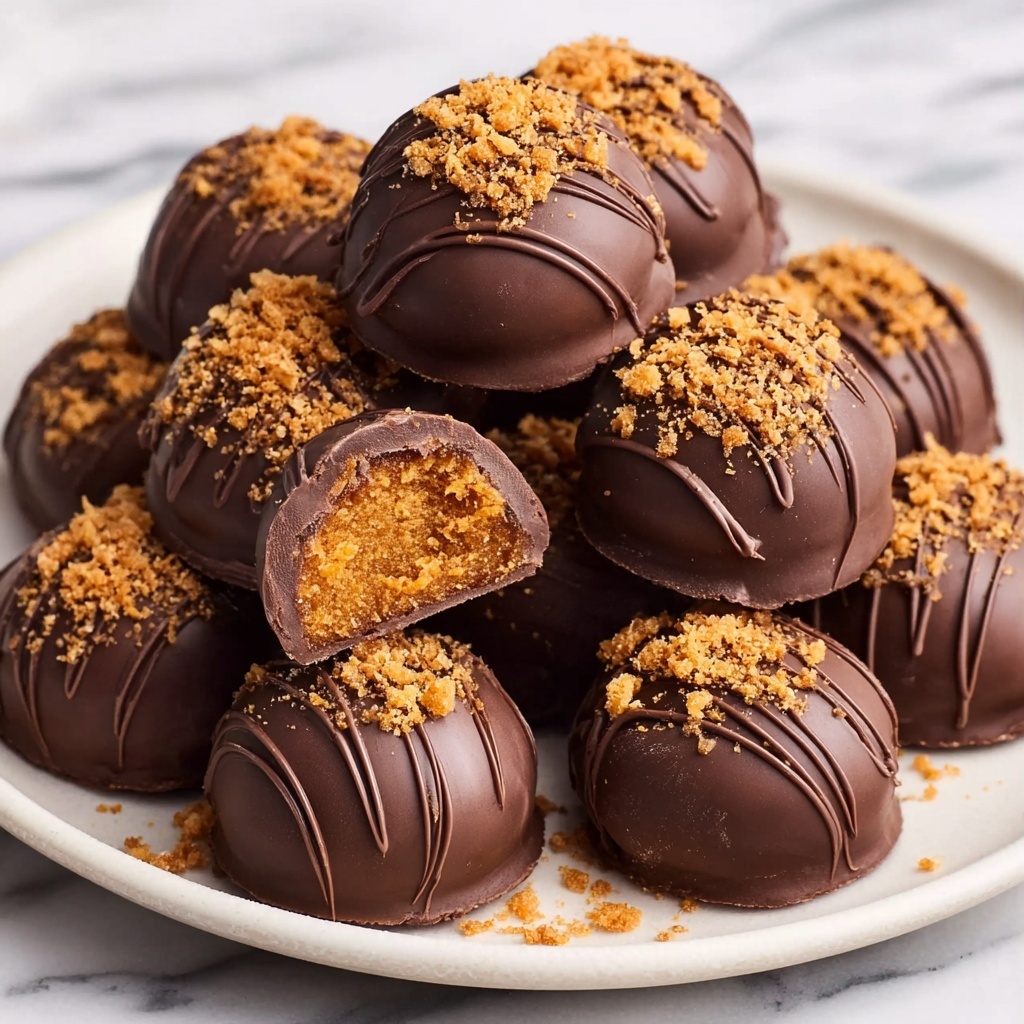
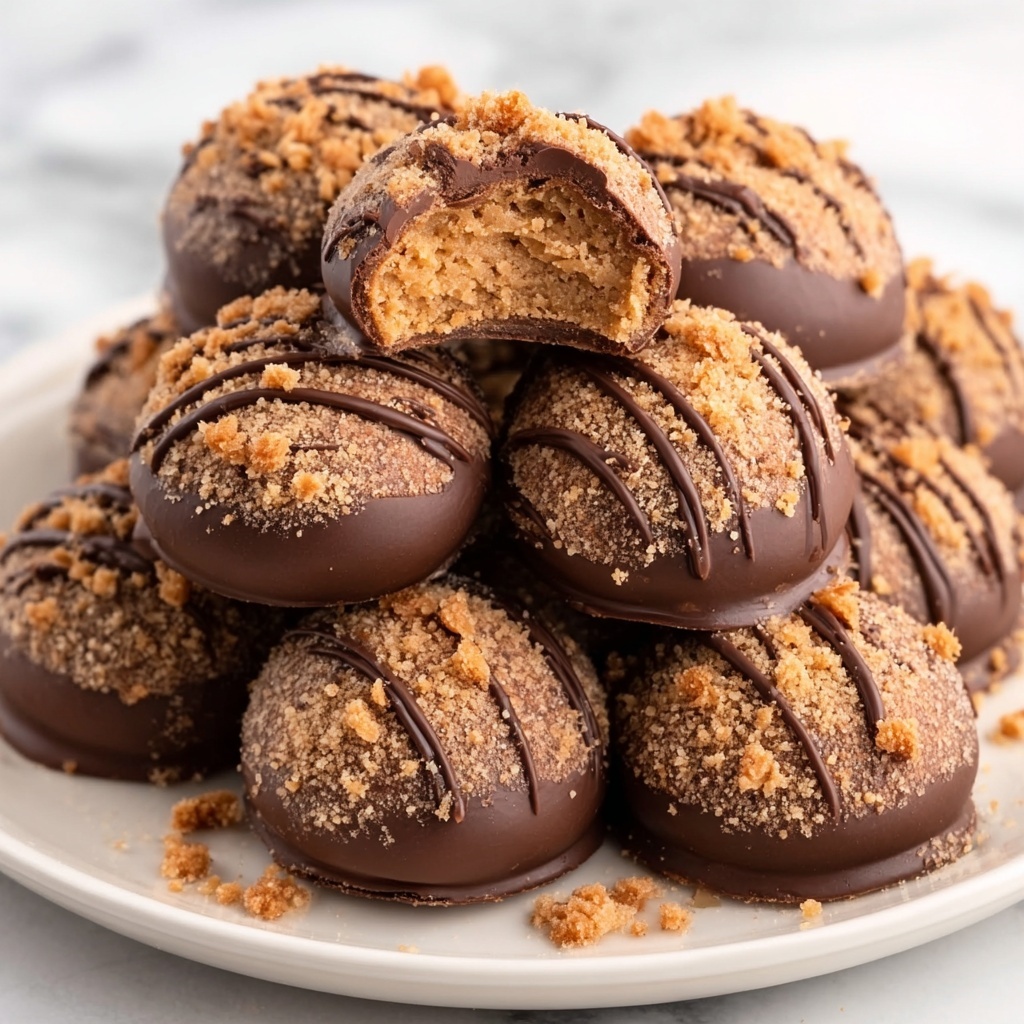
If you have a sweet tooth and love that perfect combination of peanut butter and chocolate with a delightful crunch, then the Butterfinger Balls Recipe is going to be your new obsession. These bite-sized treats marry creamy peanut butter with the unmistakable crispy, candy crunch of Butterfinger bars, all wrapped up in a luscious chocolate coating. Whether you’re looking to impress at your next gathering or simply treat yourself after a long day, these little balls of magic offer an irresistible, no-bake delight that melts in your mouth and makes snack time something to look forward to.
Ingredients You’ll Need
Getting started is a breeze with just a handful of simple ingredients. Each one plays a vital role, from the creamy texture the peanut butter brings, to the sweet crunch of crushed Butterfinger candy bars, and of course, the rich chocolate coating that ties it all together beautifully.
- 1 ½ cups creamy peanut butter: Use a smooth and creamy variety for the perfect base that’s easy to roll.
- 1 cup powdered sugar: This sweetens the mixture while helping it firm up just right.
- 1 ½ cups crushed Butterfinger candy bars: Provides that signature crispy, crunchy candy texture that sets this treat apart.
- 2 cups semi-sweet or milk chocolate chips: For coating, choose your favorite chocolate to add a decadent finish.
- 1 tablespoon coconut oil or vegetable shortening (optional): Helps melt the chocolate smoothly and gives a shiny finish when coating the balls.
How to Make Butterfinger Balls Recipe
Step 1: Mix the Peanut Butter and Sugar
Start by combining the creamy peanut butter and powdered sugar in a large bowl. Stir them together until you get a smooth, thick mixture that’s perfect to work with. This base adds sweetness, creaminess, and the structure needed for the balls to hold their shape without baking.
Step 2: Add the Crushed Butterfinger Bars
Next, gently fold in the crushed Butterfinger pieces, making sure every bit of candy is mixed throughout. This is what gives the Butterfinger Balls Recipe its famous crunch and fantastic flavor contrast. The crushed candy bars add texture and bursts of crispy delight in every bite.
Step 3: Shape the Balls and Chill
Now comes the fun part: scoop the mixture and roll it into 1-inch balls. Place them carefully on a parchment-lined baking sheet and pop them in the freezer for 20 to 30 minutes. This step is essential as chilling firms them up so they hold together during chocolate dipping and make handling much easier.
Step 4: Melt Chocolate for Dipping
While your peanut butter balls chill, melt the chocolate chips with the optional coconut oil or shortening in a microwave-safe bowl. Heat in 30-second bursts, stirring each time, until the chocolate is luxuriously smooth. This silky coating will envelop your crunchy, peanut-buttery centers perfectly.
Step 5: Dip the Balls in Chocolate
Once the balls are firm, dip each one into the melted chocolate using a fork, ensuring they are fully coated. Allow any excess chocolate to drip off before placing them back on the parchment paper to set. This method guarantees a thin, even shell of chocolate encasing each ball.
Step 6: Let the Chocolate Set
Finally, let the chocolate coating set either at room temperature or pop the tray into the refrigerator for quicker firming. Once chilled, your Butterfinger Balls are ready to enjoy or store.
How to Serve Butterfinger Balls Recipe
Garnishes
Take these treats to the next level by garnishing with a drizzle of white chocolate or sprinkling extra crushed Butterfinger pieces on top before the chocolate hardens. A pinch of flaky sea salt also complements the sweetness and makes each bite even more dynamic.
Side Dishes
While these balls stand beautifully on their own, pairing them with a cold glass of milk or a scoop of vanilla ice cream turns them into a decadent dessert spread. For parties, serve alongside fresh fruit for a refreshing contrast or with a hot cup of coffee to balance the sweetness.
Creative Ways to Present
For a stunning presentation, arrange them in mini cupcake liners on a decorative platter. You can also thread them onto skewers for dessert kabobs or package them in cute jars or gift boxes, making them perfect for holiday gifting or party favors.
Make Ahead and Storage
Storing Leftovers
Leftover Butterfinger Balls keep wonderfully in an airtight container in the refrigerator for up to a week. Chilling helps keep the chocolate shell nice and firm while preserving the candy’s crunch inside.
Freezing
If you want to keep these treats longer, freeze them in an airtight container for up to 2 months. Just thaw at room temperature for about 15 minutes before serving to bring back their perfect texture.
Reheating
No need to reheat Butterfinger Balls since they’re best enjoyed chilled. However, if you prefer them softer, simply let them sit at room temperature for a bit to take the chill off before digging in.
FAQs
Can I use crunchy peanut butter instead of creamy?
Using crunchy peanut butter is possible, but it will change the texture of your Butterfinger Balls Recipe by adding extra crunch. If you love texture, go for it, but creamy peanut butter ensures a smooth base and better shape formation.
What if I don’t have Butterfinger bars?
You can substitute with other crispy candy bars like Heath bars or crushed toffee bits, but the signature flavor of Butterfinger balls comes from the unique crispy chocolate peanut butter candy, so the taste will vary.
Is it necessary to use coconut oil or shortening?
They’re optional but helpful. Adding coconut oil or shortening to the chocolate helps it melt smoother and gives the finished coating a nice glossy look. Without it, the chocolate might be a little thicker to dip with.
How do I prevent the chocolate from melting too much on the balls?
Make sure the balls are well chilled before dipping, and work quickly but gently. If your chocolate gets too thick, warm it a little more in short bursts to keep it melt-ready without overheating.
Are Butterfinger Balls recipe gluten-free?
Butterfinger candy bars are generally gluten-free, but it’s always best to check the packaging for your specific brand. The other ingredients—peanut butter, powdered sugar, and chocolate chips—are typically gluten-free as well.
Final Thoughts
Honestly, the Butterfinger Balls Recipe is a total winner for anyone who loves easy, no-bake treats bursting with flavor and texture. They are wonderfully rich, wonderfully crunchy, and wonderfully simple to make. Trust me, once you try these, you will find yourself reaching for them over and over again, whether for yourself or to impress friends at your next get-together. You absolutely have to give them a whirl—you won’t regret it!
Print
Butterfinger Balls Recipe
- Prep Time: 20 minutes
- Cook Time: 0 minutes
- Total Time: 50 minutes (includes chilling and setting time)
- Yield: 24 balls
- Category: Dessert, Snack
- Method: No-Cook
- Cuisine: American
- Diet: Gluten Free
Description
Butterfinger Balls are irresistible no-bake peanut butter and Butterfinger candy truffles coated in rich chocolate. These easy-to-make candy treats combine creamy peanut butter, crushed Butterfinger bars, and powdered sugar, dipped in melted chocolate for a crunchy, sweet, and creamy snack perfect for holidays or anytime indulgence.
Ingredients
Butterfinger Ball Mixture
- 1 ½ cups creamy peanut butter
- 1 cup powdered sugar
- 1 ½ cups crushed Butterfinger candy bars (about 6 fun-size bars)
Chocolate Coating
- 2 cups semi-sweet or milk chocolate chips
- 1 tablespoon coconut oil or vegetable shortening (optional, for smoother coating)
Instructions
- Mix Peanut Butter and Sugar: In a large bowl, combine the creamy peanut butter and powdered sugar until the mixture is smooth and thick, forming a cohesive base.
- Add Crushed Butterfingers: Stir in the crushed Butterfinger pieces thoroughly so they are evenly distributed throughout the peanut butter mixture.
- Form Balls: Using a spoon or cookie scoop, scoop out the mixture and roll it into 1-inch balls, then place them on a parchment-lined baking sheet.
- Freeze the Balls: Place the balls in the freezer for 20–30 minutes until they are firm enough to dip.
- Melt Chocolate: In a microwave-safe bowl, melt the chocolate chips and coconut oil (if using) in 30-second intervals, stirring well between each until completely smooth.
- Dip the Balls: Dip each chilled peanut butter ball fully into the melted chocolate. Use a fork to lift it out, allowing excess chocolate to drip off, then return it to the parchment paper.
- Set the Coating: Let the chocolate-coated balls set at room temperature or place them in the refrigerator until the chocolate hardens.
Notes
- Store the Butterfinger Balls in an airtight container in the refrigerator for up to 1 week or freeze for longer storage.
- For a festive touch, drizzle with white chocolate or sprinkle additional crushed Butterfinger pieces on top before the chocolate sets.


